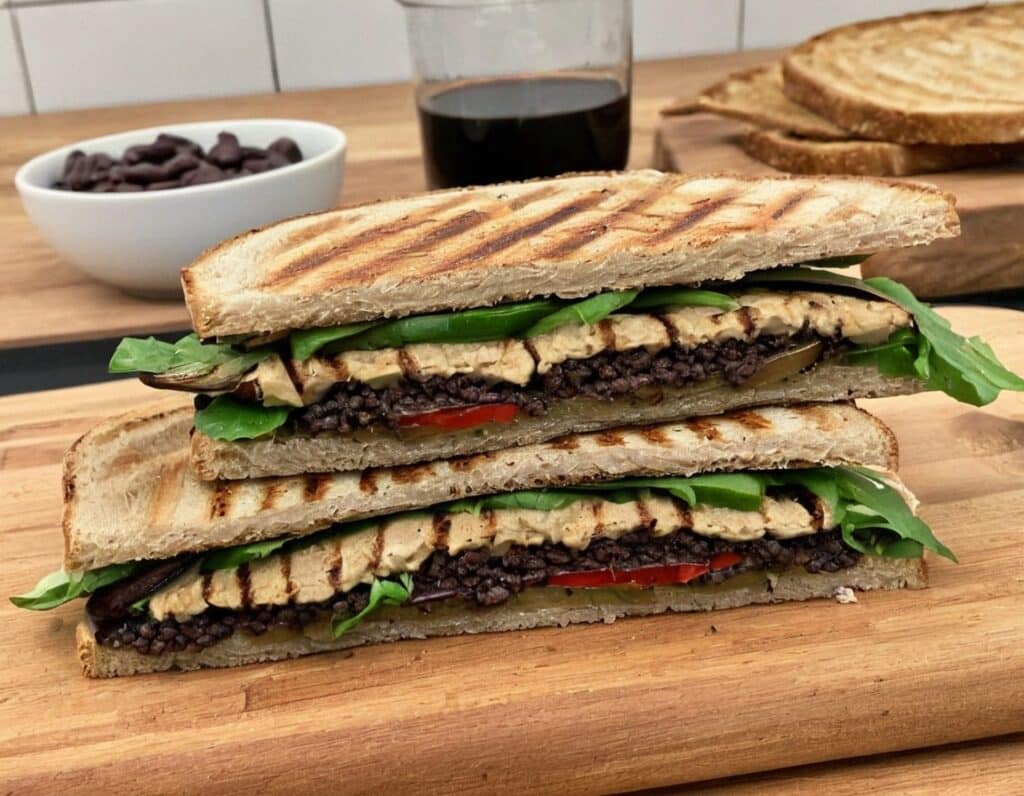
Black Bean Hummus Panini
10almonds is reader-supported. We may, at no cost to you, receive a portion of sales if you purchase a product through a link in this article.
A recipe for a sandwich? Try it once, and you’ll see why. Welcome to your new favorite!
You will need
- 1 cup cooked-and-rinsed black beans (canned is fine)
- ⅓ cup hummus (you can use our Hero Homemade Hummus recipe)
- 4 thin slices of eggplant (or more if you like it meaty)
- 4 sun-dried tomatoes
- 2 slices of your favorite bread (you can use our Delicious Quinoa Avocado Bread recipe)
- A little olive oil, ideally sprayable
Method
(we suggest you read everything at least once before doing anything)
1) Grill the eggplant slices until soft.
2) Spread hummus generously on one side of both slices of bread.
2) Add the black beans on top of one slice (the hummus will help them stay in place), followed by the sun-dried tomatoes and then the eggplant. Top with the other slice of bread, hummus-side down.
3) Coat (carefully, please) the inside of the panini press (both interior sides) with olive oil. If you don’t have sprayable oil, using a sheet of kitchen roll to apply the oil is a good way to do it without making a mess.
4) Grill the assembled sandwich, until the bread starts to brown and the insides are warm; this should take about 4 minutes.
Enjoy!
Want to learn more?
For those interested in some of the science of what we have going on today:
- Three Daily Servings of Beans?
- Chickpeas vs Black Beans – Which is Healthier?
- Lycopene’s Benefits For The Gut, Heart, Brain, & More
Take care!
Don’t Forget…
Did you arrive here from our newsletter? Don’t forget to return to the email to continue learning!
Recommended
Learn to Age Gracefully
Join the 98k+ American women taking control of their health & aging with our 100% free (and fun!) daily emails:
-
Reflexology: What The Science Says
10almonds is reader-supported. We may, at no cost to you, receive a portion of sales if you purchase a product through a link in this article.
How Does Reflexology Work, Really?
In Wednesday’s newsletter, we asked you for your opinion of reflexology, and got the above-depicted, below-described set of responses:
- About 63% said “It works by specific nerves connecting the feet and hands to various specific organs, triggering healing remotely”
- About 26% said “It works by realigning the body’s energies (e.g. qi, ki, prana, etc), removing blockages and improving health“
- About 11% said “It works by placebo, at best, and has no evidence for any efficacy beyond that”
So, what does the science say?
It works by realigning the body’s energies (e.g. qi, ki, prana, etc), removing blockages and improving health: True or False?
False, or since we can’t prove a negative: there is no reliable scientific evidence for this.
Further, there is no reliable scientific evidence for the existence of qi, ki, prana, soma, mana, or whatever we want to call it.
To save doubling up, we did discuss this in some more detail, exploring the notion of qi as bioelectrical energy, including a look at some unreliable clinical evidence for it (a study that used shoddy methodology, but it’s important to understand what they did wrong, to watch out for such), when we looked at [the legitimately very healthful practice of] qigong, a couple of weeks ago:
Qigong: A Breath Of Fresh Air?
As for reflexology specifically: in terms of blockages of qi causing disease (and thus being a putative therapeutic mechanism of action for attenuating disease), it’s an interesting hypothesis but in terms of scientific merit, it was pre-emptively supplanted by germ theory and other similarly observable-and-measurable phenomena.
We say “pre-emptively”, because despite orientalist marketing, unless we want to count some ancient pictures of people getting a foot massage and say it is reflexology, there is no record of reflexology being a thing before 1913 (and that was in the US, by a laryngologist working with a spiritualist to produce a book that they published in 1917).
It works by specific nerves connecting the feet and hands to various specific organs, triggering healing remotely: True or False?
False, or since we can’t prove a negative: there is no reliable scientific evidence for this.
A very large independent review of available scientific literature found the current medical consensus on reflexology is that:
- Reflexology is effective for: anxiety (but short lasting), edema, mild insomnia, quality of sleep, and relieving pain (short term: 2–3 hours)
- Reflexology is not effective for: inflammatory bowel disease, fertility treatment, neuropathy and polyneuropathy, acute low back pain, sub acute low back pain, chronic low back pain, radicular pain syndromes (including sciatica), post-operative low back pain, spinal stenosis, spinal fractures, sacroiliitis, spondylolisthesis, complex regional pain syndrome, trigger points / myofascial pain, chronic persistent pain, chronic low back pain, depression, work related injuries of the hip and pelvis
Source: Reflexology – a scientific literary review compilation
(the above is a fascinating read, by the way, and its 50 pages go into a lot more detail than we have room to here)
Now, those items that they found it effective for, looks suspiciously like a short list of things that placebo is often good for, and/or any relaxing activity.
Another review was not so generous:
❝The best evidence available to date does not demonstrate convincingly that reflexology is an effective treatment for any medical condition❞
~ Dr. Edzard Ernst (MD, PhD, FMedSci)
Source: Is reflexology an effective intervention? A systematic review of randomised controlled trials
In short, from the available scientific literature, we can surmise:
- Some researchers have found it to have some usefulness against chiefly psychosomatic conditions
- Other researchers have found the evidence for even that much to be uncompelling
It works by placebo, at best, and has no evidence for any efficacy beyond that: True or False?
Mostly True; of course reflexology runs into similar problems as acupuncture when it comes to testing against placebo:
How Does One Test Acupuncture Against Placebo Anyway?
…but not quite as bad, since it is easier to give a random foot massage while pretending it is a clinical treatment, than to fake putting needles into key locations.
However, as the paper we cited just above (in answer to the previous True/False question) shows, reflexology does not appear to meaningfully outperform placebo—which points to the possibility that it does work by placebo, and is just a placebo treatment on the high end of placebo (because the placebo effect is real, does work, isn’t “nothing”, and some placebos work better than others).
For more on the fascinating science and useful (applicable in daily life!) practicalities of how placebo does work, check out:
How To Leverage Placebo Effect For Yourself
Take care!
Share This Post
-
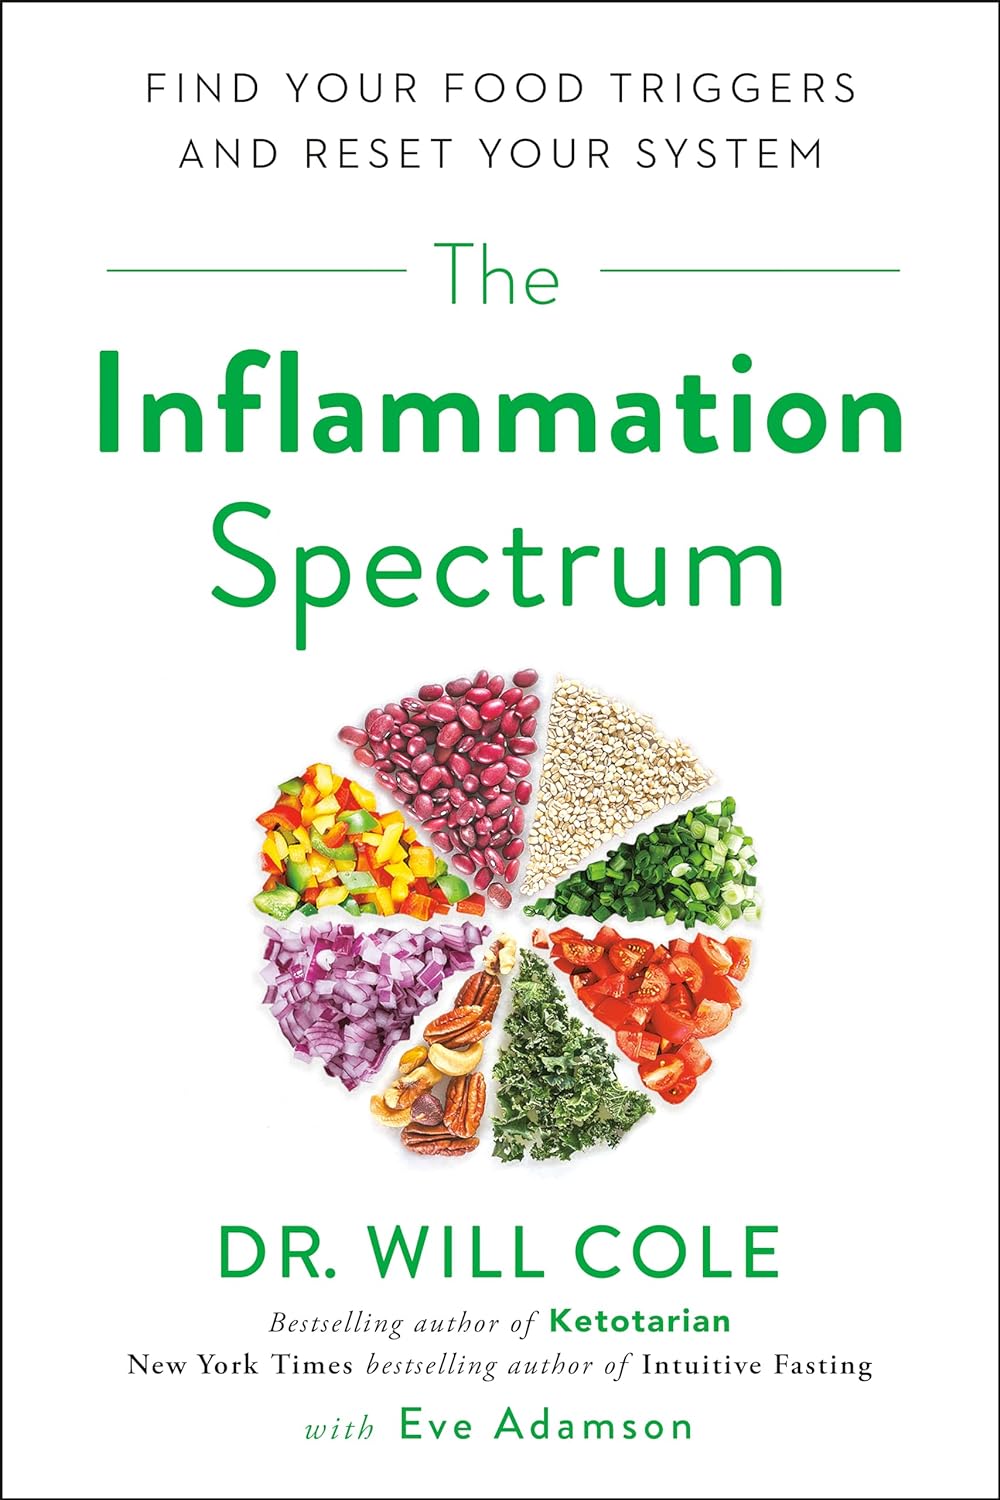
The Inflammation Spectrum – by Dr. Will Cole
10almonds is reader-supported. We may, at no cost to you, receive a portion of sales if you purchase a product through a link in this article.
We’ve previously reviewed Dr. Cole’s other book “Gut Feelings”, and now he’s back, this time to tackle inflammation.
The focus here is on understanding what things trigger inflammation in your body—personally yours, not someone else’s—by something close to the usual elimination process yes, but he offers a way of sliding into it gently instead of simply quitting all the things and gradually adding everything back in.
The next step he takes the reader through is eating not just to avoid triggering inflammation, but to actively combat it. From there, it should be possible for the reader to build an anti-inflammatory cookbook, that’s not only one’s own personal repertoire of cooking, but also specifically tailored to one’s own personal responses to different ingredients.
The style of this book is very pop-science, helpful, walking-the-reader-by-the-hand through the processes involved. Dr. Cole wants to make everything as easy as possible.
Bottom line: if your diet could use an anti-inflammatory revamp, this is a top-tier guidebook for doing just that.
Click here to check out The Inflammation Spectrum, find your food triggers and reset your system!
Share This Post
-
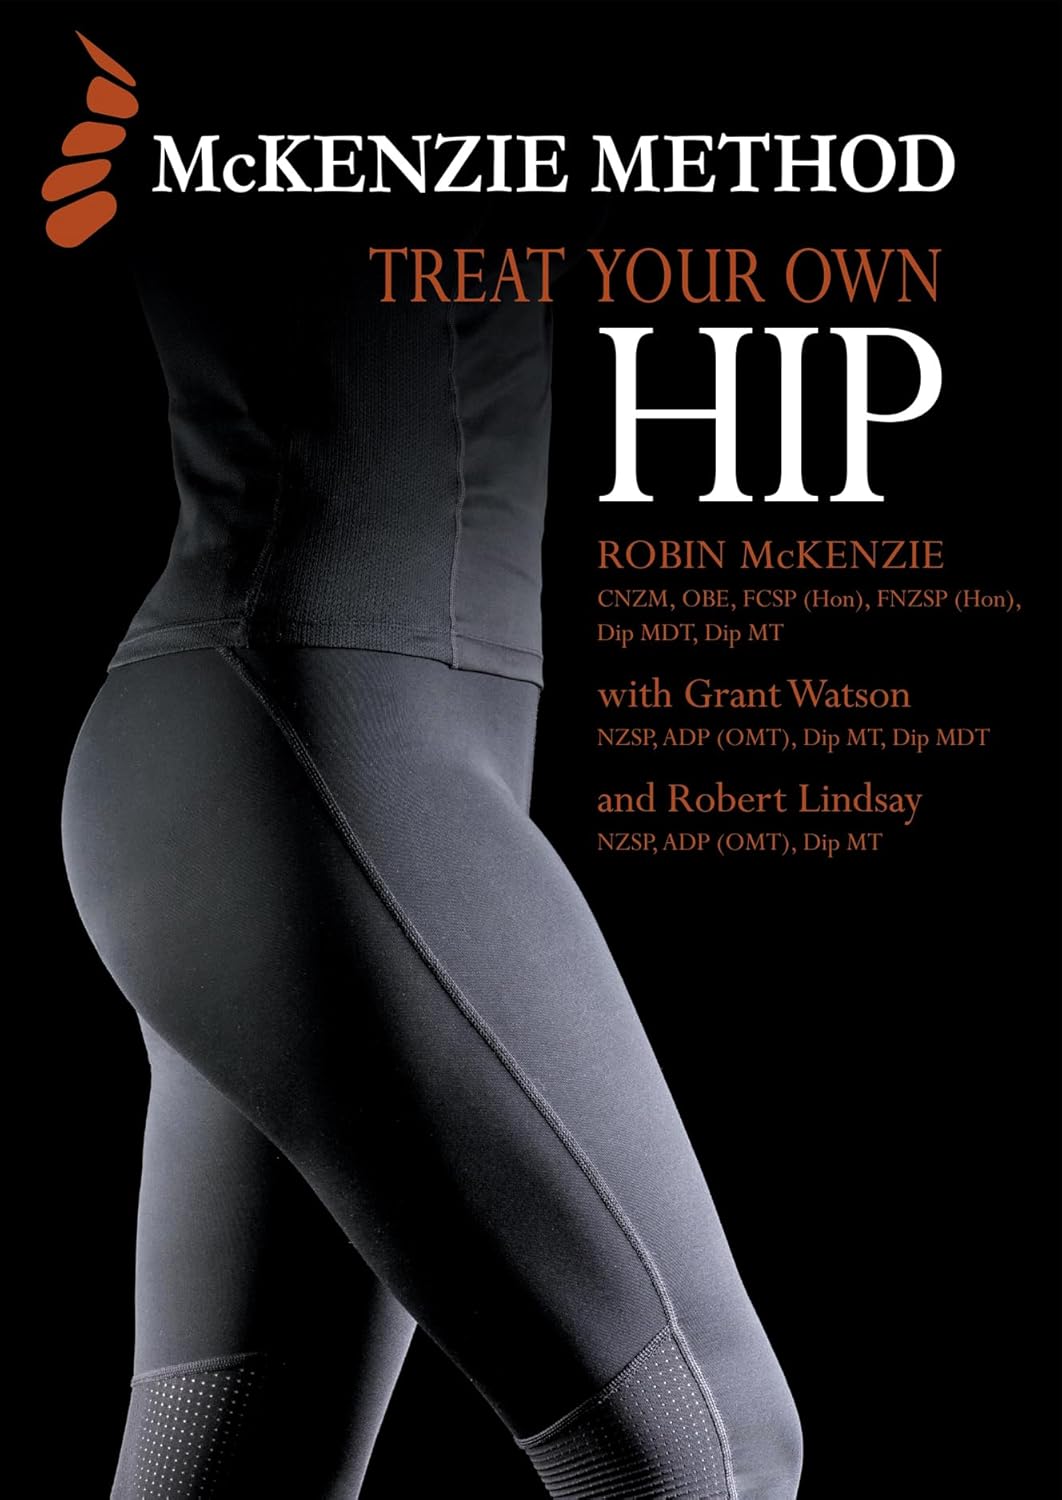
Treat Your Own Hip – by Robin McKenzie
10almonds is reader-supported. We may, at no cost to you, receive a portion of sales if you purchase a product through a link in this article.
We previously reviewed another book by this author in this series, “Treat Your Own Knee”, and today it’s the same deal, but for the hip.
A quick note about the author first: a physiotherapist and not a doctor, but with over 40 years of practice to his name and 33 letters after his name (CNZM OBE FCSP (Hon) FNZSP (Hon) Dip MDT Dip MT), he seems to know his stuff.
He takes the reader through first diagnosing the nature of the pain (and how to rule out, for example, a back problem manifesting as hip pain, rather than a hip problem per se—and points to his own “Treat Your Own Back” manual if it turns out that that’s your problem instead), and then treating it. A bold claim, the kind that many people’s lawyers don’t let them make, but once again, this guy is pretty much the expert when it comes to this. Ask any other physiotherapist, and they probably have several of his books on their shelf.
The treatments recommend are tailored to the results of various diagnostic flowcharts; essentially troubleshooting your hip. However, they mainly consist of exercises (perhaps the greatest value of the book), and lifestyle adjustments (these ones, 10almonds readers probably know already, but a reminder never hurts).
The explanations are thorough while still being comprehensible, and there is zero sensationalization or fluff. It is straight to the point, and clearly illustrated too with diagrams and photographs.
Bottom line: if you’re looking for a “one-stop shop” for diagnosing and treating your bad hip, then this is it.
Click here to check out Treat Your Own Hip, and indeed Treat Your Own Hip!
PS: if you have musculoskeletal problems elsewhere in your body, you might want to check out the rest of his body parts series (neck, back, shoulder, wrist, knee, ankle) for the one that’s tailored to your specific problem.
Share This Post
Related Posts
-
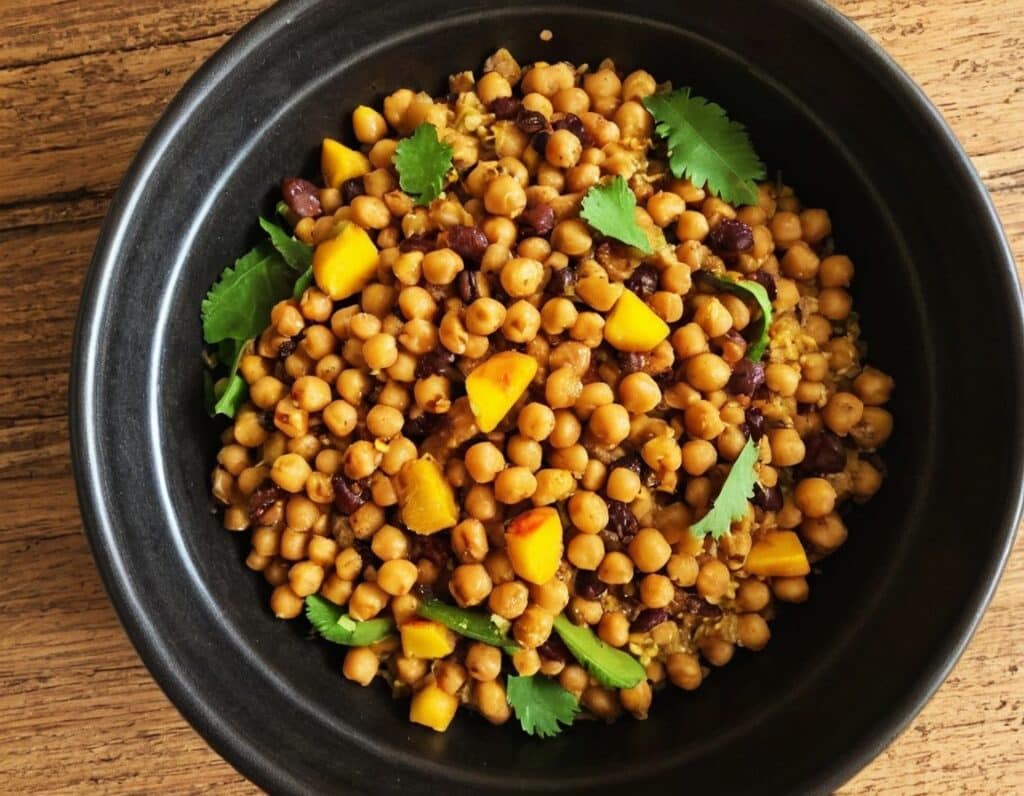
South Indian-Style Chickpea & Mango Salad
10almonds is reader-supported. We may, at no cost to you, receive a portion of sales if you purchase a product through a link in this article.
We have a double-dose of chickpeas today, but with all the other ingredients, this dish is anything but boring. Fun fact about chickpeas though: they’re rich in sitosterol, a plant sterol that, true to its name, sits on cholesterol absorption sites, reducing the amount of dietary cholesterol absorbed. If you are vegan, this will make no difference to you because your diet does not contain cholesterol, but for everyone else, this is a nice extra bonus!
You will need
- 1 can white chickpeas, drained and rinsed
- 1 can black chickpeas (kala chana), drained and rinsed
- 9 oz fresh mango, diced (or canned is fine if that’s what’s available)
- 1½ oz ginger, peeled and grated
- 2 green chilis, finely chopped (adjust per heat preferences)
- 2 tbsp desiccated coconut (or 3 oz grated coconut, if you have it fresh)
- 8 curry leaves (dried is fine if that’s what’s available)
- 1 tsp mustard seeds
- 1 tsp cumin seeds
- 1 tsp black pepper, coarse ground
- ½ tsp MSG or 1 tsp low-sodium salt
- Juice of 1 lime
- Extra virgin olive oil
Method
(we suggest you read everything at least once before doing anything)
1) Heat some oil in a skillet over a medium heat. When it’s hot but not smoking, add the ginger, chilis, curry leaves, mustard seeds, and cumin seeds, stirring well to combine, keep going until the mustard seeds start popping.
2) Add the chickpeas (both kinds), as well as the black pepper and the MSG/salt. Once they’re warm through, take it off the heat.
3) Add the mango, coconut, and lime juice, mixing thoroughly.
4) Serve warm, at room temperature, or cold:
Enjoy!
Want to learn more?
For those interested in some of the science of what we have going on today:
- What Matters Most For Your Heart?
- Can Saturated Fats Be Healthy?
- Our Top 5 Spices: How Much Is Enough For Benefits?
Take care!
Don’t Forget…
Did you arrive here from our newsletter? Don’t forget to return to the email to continue learning!
Learn to Age Gracefully
Join the 98k+ American women taking control of their health & aging with our 100% free (and fun!) daily emails:
-
Beetroot vs Red Cabbage – Which is Healthier?
10almonds is reader-supported. We may, at no cost to you, receive a portion of sales if you purchase a product through a link in this article.
Our Verdict
When comparing beetroot to red cabbage, we picked the red cabbage.
Why?
Both are great, and both have their strengths!
In terms of macros, beetroot has very slightly more protein, carbs, and fiber, but the margins of difference are very small in each case. However, in terms of glycemic index, red cabbage has the considerably lower glycemic index, of 32 (low) as opposed to beetroot’s GI of 64 (medium). On the strength of this GI difference, we call this category a win for red cabbage.
In the category of vitamins, beetroot has more of vitamin B9, while red cabbage has a lot more of vitamins A, B1, B2, B3, B6, C, E, K, and choline. By strength of numbers and also by having very large margins of difference on most of those, red cabbage is the clear winner here.
When it comes to minerals, beetroot has more copper, magnesium, manganese, phosphorus, and potassium, while red cabbage has more calcium (and about ⅓ of the sodium). By the numbers, this is a win for beetroot, though it’s worth noting that the margins of difference were small, i.e. red cabbage was right behind beetroot on each of those.
Adding up the sections makes for an overall red cabbage win, but as we say, beetroot is great too, especially when it comes to minerals!
As ever, enjoy either or both; diversity is good.
Want to learn more?
You might like to read:
No, beetroot isn’t vegetable Viagra. But here’s what it can do!
Enjoy!
Don’t Forget…
Did you arrive here from our newsletter? Don’t forget to return to the email to continue learning!
Learn to Age Gracefully
Join the 98k+ American women taking control of their health & aging with our 100% free (and fun!) daily emails:
-
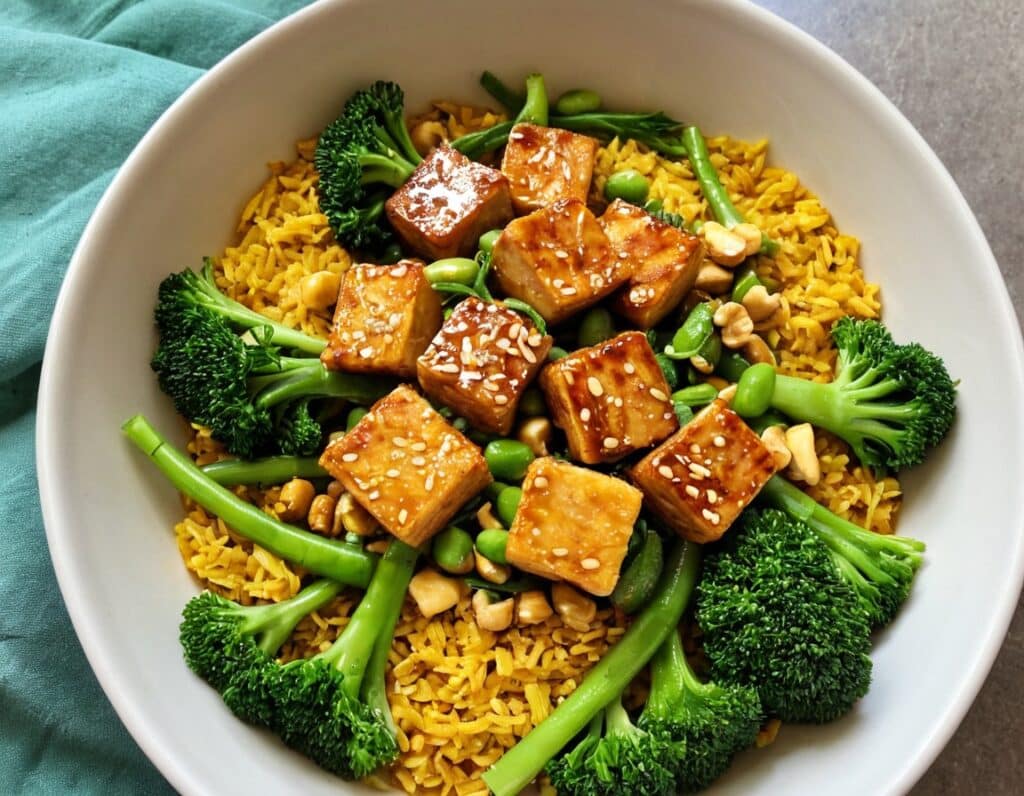
Sesame & Peanut Tofu
10almonds is reader-supported. We may, at no cost to you, receive a portion of sales if you purchase a product through a link in this article.
Yesterday we learned how to elevate tofu from “nutrition” to “nutritious tasty snack” with our Basic Baked Tofu recipe; today we’re expanding on that, to take it from “nutritious tasty snack” to “very respectable meal”.
You will need
For the tofu:
- The Basic Baked Tofu that we made yesterday (consider making this to be “step zero” of today’s recipe if you don’t already have a portion in the fridge)
For the sauce:
- ⅓ cup peanut butter, ideally with no added sugar or salt (if allergic to peanuts specifically, use almond butter; if allergic to nuts generally, use tahini)
- ¼ bulb garlic, grated or crushed
- 1 tbsp tamarind paste
- 1½ tbsp tamari sauce (or low-sodium soy sauce, if a substitution is necessary)
- 1 tbsp sambal oelek (or sriracha sauce, if a substitution is necessary)
- 1 tsp ground coriander
- 1 tsp ground black pepper
- ½ tsp ground sweet cinnamon
- ½ tsp MSG (or else omit; do not substitute with salt in this case unless you have a particular craving)
- zest of 1 lime
For the vegetables:
- 14 oz broccolini / tenderstem broccoli, thick ends trimmed (failing that, any broccoli)
- 6 oz shelled edamame
- 1½ tsp toasted sesame oil
For serving:
- 4 cups cooked rice (we recommend our Tasty Versatile Rice recipe)
- ½ cup raw cashews, soaked in hot water for at least 5 minutes and then drained (if allergic, substitute cooked chickpeas, rinsed and drained)
- 1 tbsp toasted sesame seeds
- 1 handful chopped cilantro, unless you have the “this tastes like soap” gene, in which case substitute chopped parsley
Method
(we suggest you read everything at least once before doing anything)
1) Combine the sauce ingredients in a bowl and whisk well (or use a blender if you have one that’s comfortable with this relatively small quantity of ingredients). Taste it, and adjust the ingredient ratios if you’d like more saltiness, sweetness, sourness, spiciness, umami.
2) Prepare a bowl with cold water and some ice. Steam the broccolini and edamame for about 3 minutes; as soon as they become tender, dump them into the ice bathe to halt the cooking process. Let them chill for a few minutes, then drain, dry, and toss in the sesame oil.
3) Reheat the tofu if necessary (an air fryer is great for this), and then combine with half of the sauce in a bowl, tossing gently to coat well.
4) Add a little extra water to the remaining sauce, enough to make it pourable, whisking to an even consistency.
5) Assemble; do it per your preference, but we recommend the order: rice, vegetables, tofu, cashews, sauce, sesame seeds, herbs.
Enjoy!
Want to learn more?
For those interested in some of the science of what we have going on today:
- Tofu vs Seitan – Which is Healthier?
- Plant vs Animal Protein: Head to Head
- Sweet Cinnamon vs Regular Cinnamon – Which is Healthier?
- Our Top 5 Spices: How Much Is Enough For Benefits?
Take care!
Don’t Forget…
Did you arrive here from our newsletter? Don’t forget to return to the email to continue learning!
Learn to Age Gracefully
Join the 98k+ American women taking control of their health & aging with our 100% free (and fun!) daily emails:

