
5 Minute Posture Improvement Routine!
10almonds is reader-supported. We may, at no cost to you, receive a portion of sales if you purchase a product through a link in this article.
McKay Lang walks us through it:
Step by Step
Breathing exercise:
- Place your hands on your lower abdomen.
- Take three deep breaths, focusing on body tension in the shoulders and neck… And release.
Shoulder squeeze:
- With your hands on your hips, inhale and squeeze your shoulders upwards.
- Hold your breath for 3–4 seconds, then exhale.
- Repeat two more times, holding the squeeze a little longer each time.
Upper shoulder massage:
- Massage your upper shoulder muscles to release tension stored there.
Overhead arm stretch:
- Raise your arms above your head, clasping each elbow with the opposite hand.
- Inhale deeply, stretch upwards, then exhale and release.
- Repeat, alternating elbows.
Neck and head push:
- Place your palms on the back of the head, and push your head into your hands (and vice versa, because of Newton’s Third Law of Motion).
- Do the same sideways (one side and then the other), to engage the other neck muscles.
Cool down:
- Gently unclasp your hands, bring your head upright, and massage your muscles. And breathe.
For variations and a visual demonstration of all, enjoy:
Click Here If The Embedded Video Doesn’t Load Automatically!
Want to learn more?
You might also like to read:
6 Ways To Look After Your Back
Take care!
Don’t Forget…
Did you arrive here from our newsletter? Don’t forget to return to the email to continue learning!
Learn to Age Gracefully
Join the 98k+ American women taking control of their health & aging with our 100% free (and fun!) daily emails:
-

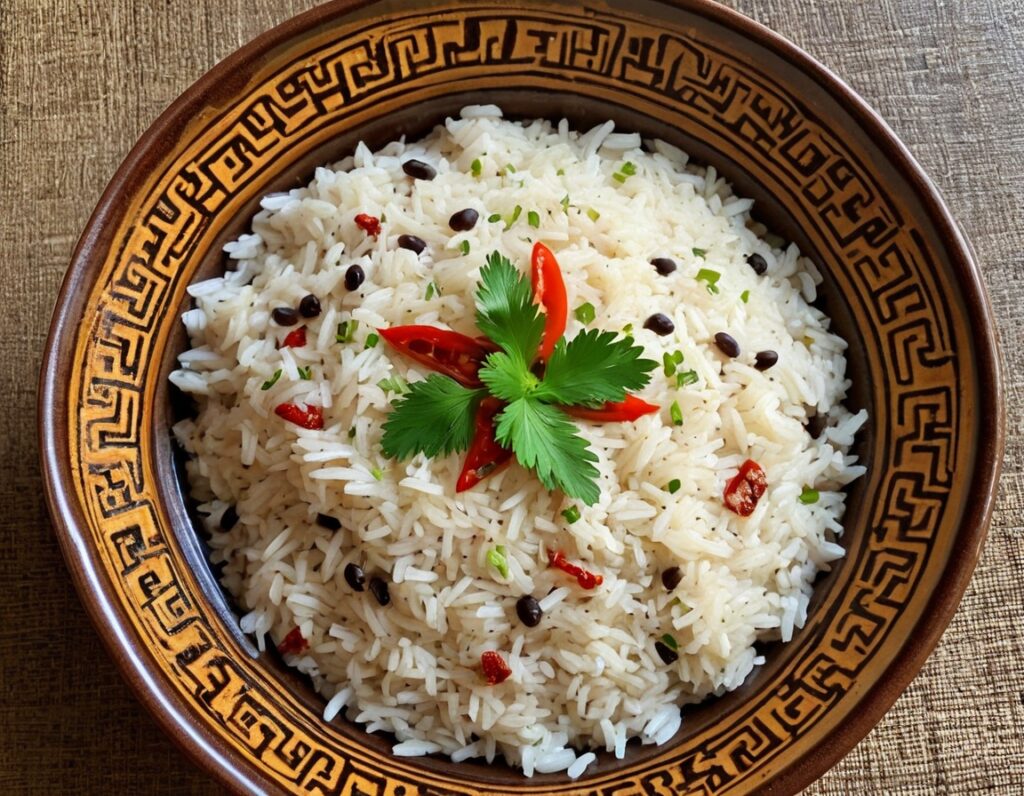
Jamaican Coconut Rice

10almonds is reader-supported. We may, at no cost to you, receive a portion of sales if you purchase a product through a link in this article.
This is a great dish that can be enjoyed hot or cold, as a main or as a side. It has carbs, proteins, healthy fats, fiber, as well as an array of healthy phytochemicals. Not to mention, a great taste!
You will need
- 1 cup wholegrain basmati rice (it may also be called “brown basmati rice“; this is the same) (traditional recipe calls for pudding rice, but we’re going with the healthier option here)
- 2 cans (each 12 z / 400g) coconut milk
- 2 cups (or 2 cans, of which the drained weight is comparable to a cup each) cooked black beans. If you cook them yourself, this is better, as you will be able to cook them more al dente than you can get from a can, and this firmness is desirable. But canned is fine if that’s what’s available.
- 1 large red onion, finely chopped
- ½ cup low-sodium vegetable stock (ideally you made this yourself from vegetable offcuts you saved in the freezer for this purpose, but failing that, low-sodium stock cubes can be bought at any large supermarket)
- 2 serrano chilis, finely chopped
- 1 Scotch bonnet chili, without doing anything to it
- 1 tbsp black pepper, coarse ground
- 1 tbsp chia seeds
- 1 tbsp coconut oil
- Garnish: parsley, chopped
Note: we have erred on the side of low-heat when it comes to the chilis. If you know that you and (if applicable) everyone else eating would enjoy more heat, add more heat. If not, let extra heat be added at the table via your hot sauce of choice. Sounds heretical, but it ensures everyone gets the right amount! It’s easy to add heat than to take it out, after all.
However: if you do end up with too much heat in this or any other dish, adding acid will usually help to neutralize that. In the case of this dish, we’d recommend lime juice as a complementary flavor.
Method
(we suggest you read everything at least once before doing anything)
1) In a big sauté pan, add the coconut oil, melt it if not already melted, and add the chopped onion and the chopped chilis, at a temperature sufficient to sizzle. Keep them all moving. Once the coconut oil is absorbed into the onion (this will happen before the onion is fully cooked), add the vegetable stock, followed by the coconut milk; mix it all gently to create a smooth consistency.
2) Add the rice, chia seeds, and black pepper; mix it all gently but thoroughly; turn the temperature to a simmer, and add the Scotch bonnet chili, without cutting it at all.
3) Cover and keep on low for about 20–30 minutes until the rice is looking done. Check on it periodically to make sure it’s not running out of liquid, but resist the urge to stir it; it shouldn’t be burning but paradoxically, once you start stirring you can’t stop or it will definitely burn.
4) Take out the Scotch bonnet chili, and discard*. Add the black beans.
*its job was to add flavor without adding the high-level heat of that particular chili. If you’re a regular heat-fiend, feel free to experiment with using sliced Scotch bonnet chilis instead of serrano chilis; just be aware that there’s a big difference in heat. Only do this if you really like heat. Using it the way we described in the main recipe is what’s traditional in the Caribbean, by the way.
5) Now you can (and in fact must) stir, to mix in the black beans and bring them back to temperature within the dish. Be aware that once you start stirring, you need to keep stirring until you’re ready to take it off the heat.
6) Serve, adding the parsley garnish.

(this example went light on the beans; our recipe includes more for a heartier dish)
Enjoy!
Want to learn more?
For those interested in some of the science of what we have going on today:
- Should You Go Light Or Heavy On Carbs?
- Our Top 5 Spices: How Much Is Enough For Benefits?
- Why You’re Probably Not Getting Enough Fiber (And How To Fix It)
- Burn! How To Boost Your Metabolism
- Capsaicin For Weight Loss And Against Inflammation
Take care!
Share This Post
-

The Spectrum of Hope – by Dr. Gayatri Devi
10almonds is reader-supported. We may, at no cost to you, receive a portion of sales if you purchase a product through a link in this article.
We’ve written before about Dr. Devi’s work (See: “Alzheimer’s: The Bad News And The Good“) but she has plenty more to say than we could fit in an article.
The book is written for patients, family/carers, and clinicians—without getting deep into the science, which it is assumed clinicians will know. the general style of the book is pop-science, and it’s more about addressing the misconceptions around Alzheimer’s, rather than focusing on neurological features such as beta amyloid plaques and tau proteins and the like.
Dr. Devi explains a lot about the experience of Alzheimer’s—what to expect, or rather, what to know about in advance. Because, as she explains, there are a lot of different manifestations of Alzheimer’s that are all lumped under the same umbrella.
This means that a person could have negligible memory but perfect language and reasoning skills, or the other way around, or some other combination of symptoms showing up or not.
Which means that any plan for managing one’s Alzheimer’s needs to be adaptable and personalized, which is something Dr. Devi talks us through, too.
Bottom line: if you are a loved one has Alzheimer’s, or you just like to be prepared, this is a great book to prepare anybody for just that.
Click here to check out The Spectrum of Hope, and hold onto that hope!
Share This Post
-

Eat to Live – by Dr. Joel Fuhrman
10almonds is reader-supported. We may, at no cost to you, receive a portion of sales if you purchase a product through a link in this article.
It sure would be great if we could eat all that we wanted, and remain healthy without putting on weight.
That’s the main intent of Dr. Joel Fuhrman’s book, with some caveats:
- His diet plan gives unlimited amounts of some foods, while restricting others
- With a focus on nutrient density, he puts beans and legumes into the “eat as much as you want” category, and grains (including whole grains) into the “restrict” category
This latter is understandable for a weight-loss diet (as the book’s subtitle promises). The question then is: will it be sustainable?
Current scientific consensus holds for “whole grains are good and an important part of diet”. It does seem fair that beans and legumes should be able to replace grains, for grains’ carbohydrates and fiber.
However, now comes the double-edged aspect: beans and legumes contain more protein than grains. So, we’ll feel fuller sooner, and stay fuller for longer. This means we’ll probably lose weight, and keep losing weight. Or at least: losing fat. Muscle mass will stay or go depending on what you’re doing with your muscles.
If you want to keep your body fat percentage at a certain level and not go below it, you may well need to reintroduce grains to your diet, which isn’t something that Dr. Fuhrman covers in this book.
Bottom line: this is a good, science-based approach for healthily losing weight (specifically, fat) and keeping it off. It might be a little too good at this for some people though.
Click here to check out Eat To Live and decide what point you want to stop losing weight at!
Share This Post

-

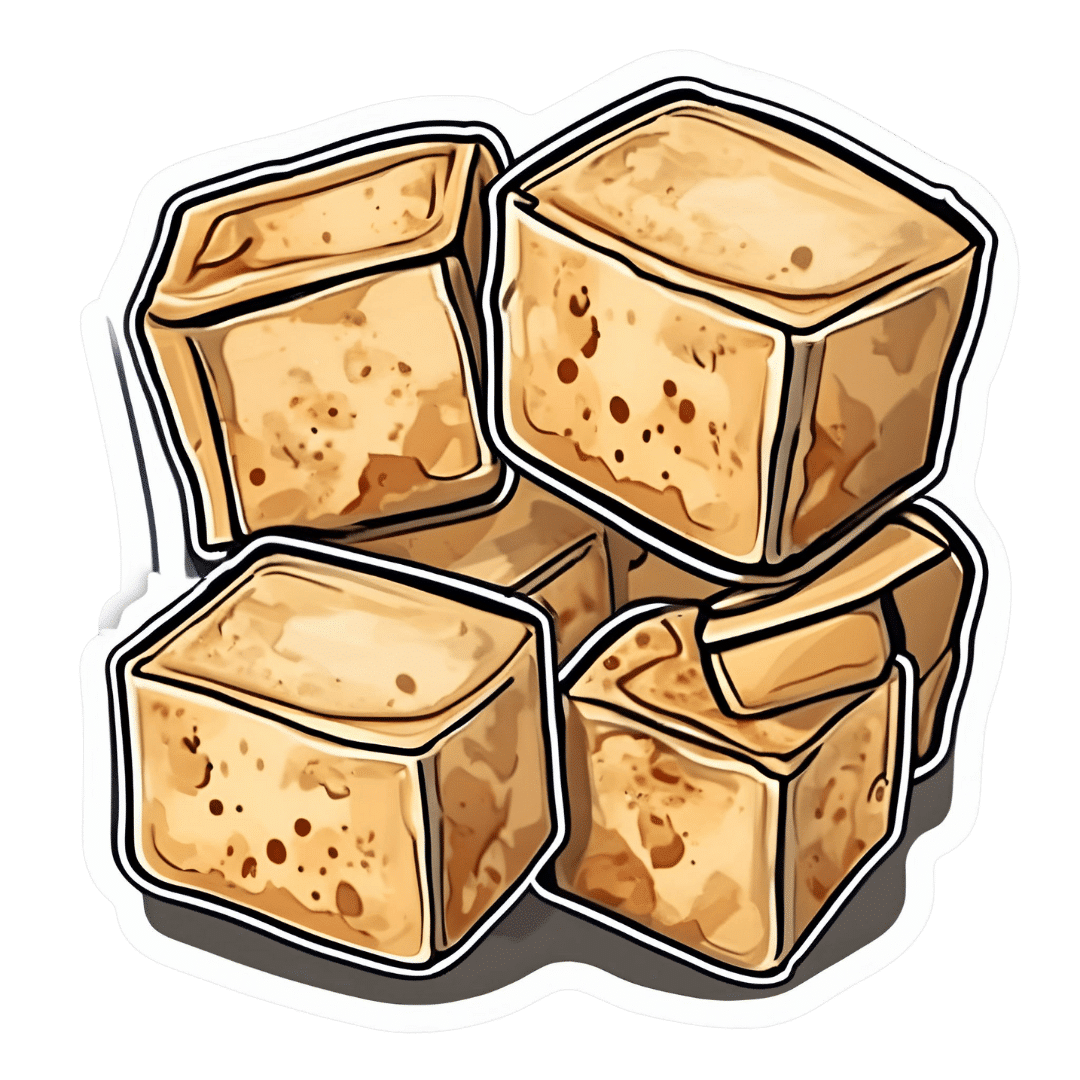
Basic Baked Tofu
10almonds is reader-supported. We may, at no cost to you, receive a portion of sales if you purchase a product through a link in this article.
One of the main criticisms of tofu is that it is tasteless. Well, so is flour, but you’re not supposed to eat it plain, and the same goes for tofu. It’s a blank canvas that you get to decide what to do with—not to mention, it’s a canvas that’s very high in protein, and is a complete protein too, containing all essential amino acids. Anyway, here’s a starter recipe that elevates tofu from “nutrition” to “nutritious tasty snack”!
We were going to do a fancier recipe today, but considered that it might be judicious to cover this basic element first, that can be incorporated into a larger recipe later, a bit like we have done with recipes such as our Tasty Versatile Rice, and Plant-Based Healthy Cream Cheese (amongst others).
You will need
- 1 block of extra-firm tofu; these are quite standardized in size; it should be about 12oz; don’t worry if it’s a little more or less.
- 2 tbsp arrowroot powder (or potato starch if you don’t have arrowroot)
- 1½ tbsp extra virgin olive oil
- 1 tbsp nutritional yeast
- 1 tsp black pepper
- ½ tsp MSG or 1 tsp low-sodium salt
- Optional: ½ tsp garlic powder
- Optional: ½ tsp ground turmeric
Method
(we suggest you read everything at least once before doing anything)
1) Preheat the oven to 425ºF / 220ºC.
2) Press the tofu for about 15 minutes (to remove excess moisture), using a tofu press if you have one. If you don’t, then here is an example product on Amazon, or alternatively, you can go with the time-honored tradition of cutting the tofu lengthways into slabs, and wrapping it in a lint-free kitchen towel or muslin cloth, and pressing it with heavy books. We don’t recommend pressing for more than about 15 minutes, as you are going to bake the tofu so you don’t want it too dry going in.
3) Cut the tofu into cubes. Size is up to you, but half-inch cubes are very respectable.
4) Combine the tofu cubes in a big bowl with the oil and seasonings, including the nutritional yeast but not the arrowroot powder or potato starch yet. You will need to toss them gently (very gently; they are fragile!) to combine.
5) Add the arrowroot powder or potato starch, and again toss gently to combine. We do this last, because it would stop the other things from sticking properly if we did it earlier.
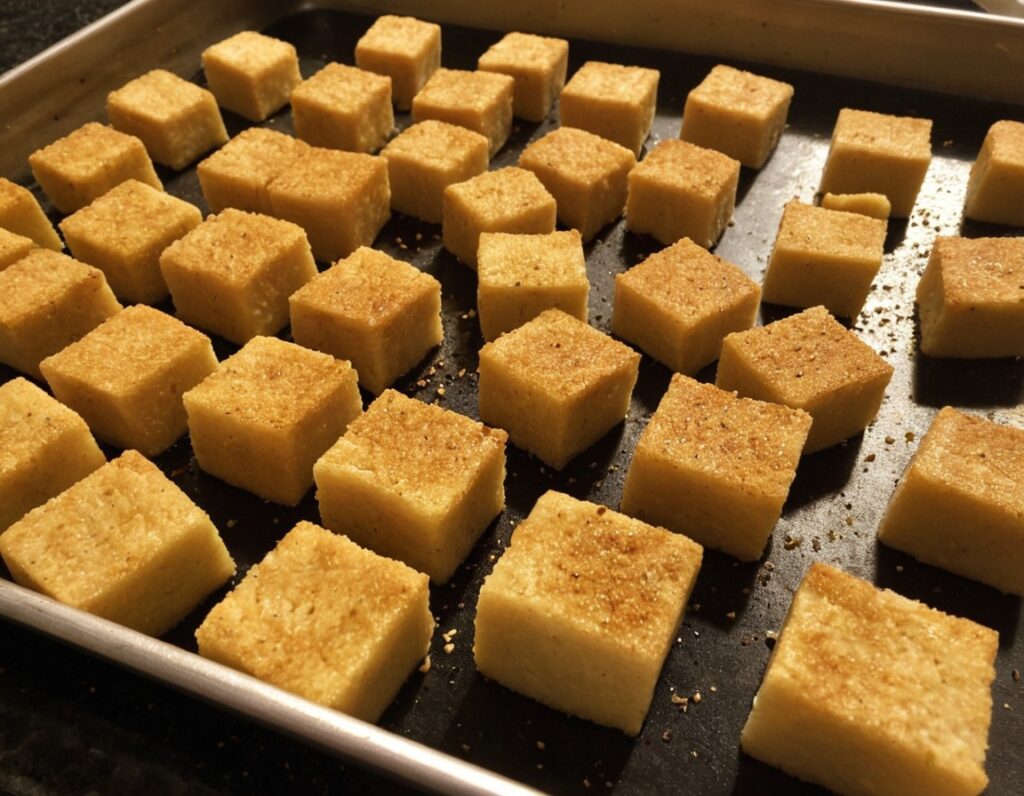
6) Arrange the tofu on a baking tray lined with baking paper, in a single layer so that the cubes don’t touch. Bake for 15 minutes, turn them over, and bake for a further 15 minutes on the other side. They should now be golden and crisp, but if they’re not, just give them a little more time.
7) Serve as a snack, or set aside for whatever else you’re going to do with them in a larger more complex recipe.

Enjoy!
Want to learn more?
For those interested in some of the science of what we have going on today:
- Tofu vs Seitan – Which is Healthier?
- Plant vs Animal Protein: Head to Head
- Our Top 5 Spices: How Much Is Enough For Benefits?
Take care!
Don’t Forget…
Did you arrive here from our newsletter? Don’t forget to return to the email to continue learning!
Learn to Age Gracefully
Join the 98k+ American women taking control of their health & aging with our 100% free (and fun!) daily emails:
-

Tips For Avoiding/Managing Rheumatoid Arthritis
10almonds is reader-supported. We may, at no cost to you, receive a portion of sales if you purchase a product through a link in this article.
Avoiding/Managing Rheumatoid Arthritis
Arthritis is the umbrella term for a cluster of joint diseases involving inflammation of the joints, hence “arthr-” (joint) “-itis” (suffix used to denote inflammation). These are mostly, but not all, autoimmune diseases, in which the body’s immune system mistakenly attacks our own joints.
Inflammatory vs Non-Inflammatory Arthritis
Arthritis is broadly divided into inflammatory arthritis and non-inflammatory arthritis.
You may be wondering: how does one get non-inflammatory inflammation of the joints?
The answer is, in “non-inflammatory” arthritis, such as osteoarthritis, the damage comes first (by general wear-and-tear) and inflammation generally follows as part of the symptoms, rather than the cause. So the name can be a little confusing. In the case of osteo- and other “non-inflammatory” forms of arthritis, you definitely still want to keep your inflammation at bay as best you can, but it’s not as absolutely critical a deal as it is for “inflammatory” forms of arthritis.
We’ll tackle the beast that is osteoarthritis another day, however.
Today we’re going to focus on…
Rheumatoid Arthritis
This is the most common of the autoimmune forms of arthritis. Some quick facts:
- It affects a little under 1% of the global population, but the older we get, the more likely it becomes
- Early onset of rheumatoid arthritis is most likely to show up around the age of 50 (but it can show up at any age)
- However, incidence (not onset) of rheumatoid arthritis peaks in the 70s age bracket
- It is 2–4 times more common in women than in men
- Approximately one third of people stop work within two years of its onset, and this increases thereafter.
Well, that sounds gloomy.
Indeed it’s not fun. There’s a lot of stiffness and aching of joints (often with swelling too), loss of joint function can be common, and then there are knock-on effects like fatigue, weakness, and loss of appetite.
Beyond that it’s an autoimmune disorder, its cause is not known, and there is no known cure.
Is there any good news?
If you don’t have rheumatoid arthritis at the present time, you can reduce your risk factors in several ways:
- Having an anti-inflammatory diet. Get plenty of fiber, greens, and berries. Fatty fish is great too, as are oily nuts. On the other side of things, high consumption of salt, sugar, alcohol, and red meat are associated with a greater risk of developing rheumatoid arthritis.
- Not smoking. Smoking is bad for pretty much everything, including your chances of developing rheumatoid arthritis.
- Not being obese. This one may be more a matter of correlation than causation, because of the dietary factors (if one eats an anti-inflammatory diet, obesity is less likely), but the association is there.
There are other risk factors that are harder to control, such as genetics, age, sex, and having a mother who smoked.
See: Genetic and environmental risk factors for rheumatoid arthritis
What if I already have rheumatoid arthritis?
If you already have rheumatoid arthritis, it becomes a matter of symptom management.
First, reduce inflammation any (reasonable) way you can. We did a main feature on this before, so we’ll just drop that again here:
Next, consider the available medications. Your doctor may or may not have discussed all of the options with you, so be aware that there are more things available than just pain relief. To talk about them all would require a whole main feature, so instead, here’s a really well-compiled list, along with explanations about each of them, up to date as of this year:
Rheumatoid Arthritis Medication List (And What They Do, And How)
Finally, consider other lifestyle adjustments to manage your symptoms. These include:
- Exercise—gently, though! You do not want to provoke a flare-up, but you do want to maintain your mobility as best you can. There’s a use-it-or-lose-it factor here. Swimming and yoga are great options, as is tai chi. You may want to avoid exercises that involve repetitive impacts to your joints, like running.
- Rest—while keeping mobility going. Get good sleep at night (this is important), but don’t make your bed your new home, or your mobility will quickly deteriorate.
- Hot & cold—both can help, and alternating them can reduce inflammation and stiffness by improving your body’s ability to respond appropriately to these stimuli rather than getting stuck in an inappropriate-response state of inflammation.
- Mobility aids—if it helps, it helps. Maybe you only need something during a flare-up, but when that’s the case, you want to be as gentle on your body as possible while keeping moving, so if crutches, handrails etc help, then by all means get them and use them.
- Go easy on the use of braces, splints, etc—these can offer short-term relief, but at a long term cost of loss of mobility. Only you can decide where to draw the line when it comes to that trade-off.
You can also check out our previous article:
Managing Chronic Pain (Realistically!)
Take good care of yourself!
Don’t Forget…
Did you arrive here from our newsletter? Don’t forget to return to the email to continue learning!
Learn to Age Gracefully
Join the 98k+ American women taking control of their health & aging with our 100% free (and fun!) daily emails:
-

Lucid Dreaming: How To Do It, & Why
10almonds is reader-supported. We may, at no cost to you, receive a portion of sales if you purchase a product through a link in this article.
Lucid Dreaming: Methods & Uses
We’ve written about dreaming more generally before:
Today we’re going to be talking more about a subject we’ve only touched on previously: lucid dreaming
What it is: lucid dreaming is the practice of being mentally awake while dreaming, with awareness that it is a dream, and control over the dream.
Why is it useful? Beyond simply being fun, it can banish nightmares, it can improve one’s relationship with sleep (always something to look forward to, and sleep doesn’t feel like a waste of time at all!), and it can allow for exploring a lot of things that can’t easily be explored otherwise—which can be quite therapeutic.
How to do it
There are various ways to induce lucid dreaming, but the most common and “entry-level” method is called Mnemonic-Induced Lucid Dreaming (MILD).
MILD involves having some means of remembering what one has forgotten, i.e., that one is dreaming. To break it down further, first we’ll need to learn how to perform a reality check. Again, there are many of these, but one of the simplest is to ask yourself:
How did I get here?
- If you can retrace your steps with relative ease and the story of how you got here does not sound too much like a dream sequence, you are probably not dreaming.
- If you are dreaming, however, chances are that nothing actually led to where you are now; you just appeared here.
Other reality checks include checking whether books, clocks, and/or lightswitches work as they should—all are notorious for often being broken in dreams; books have gibberish or missing or repeated text; clocks do not tell the correct time and often do not even tell a time that could be real (e.g: 07:72), and lightswitches may turn a light on/off without actually changing the level of illumination in the room.
Now, a reality check is only useful if you actually perform it, so this is where MILD comes in.
You need to make a habit of doing a reality check frequently. Whenever you remember, it’s a good time to do a reality check, but you should also try tying it to something. Many people use a red light, because then they can also use a timed red light during the night to subconsciously cue them that they are dreaming. But it could be as simple as “whenever I go to the bathroom, I do a reality check”.
With this in mind, a fun method that has extra benefits is to try to use a magical power, such as psychokinesis. If (while fully awake) whenever you go to pick up some object you imagine it just wooshing magically to meet your hand halfway, then at some point you’ll instinctively do that while dreaming, and it’ll stand a good chance of working—and thus cluing you in that you are dreaming.
How to stay lucid
When you awaken within a dream (i.e. become lucid), there’s a good chance of one of two things happening quickly:
- you forget again
- you wake up
So when you realize you are dreaming, do two things at once:
- verbally repeat to yourself “I am dreaming now”. This will help stretch your awareness from one second to the next.
- look at your hands, and touch things, especially the floor and/or walls. This will help to ground you within the dream.
Things to do while lucid
Flying is a good fun entry-level activity; it’s very common to initially find it difficult though, and only be able to lift up very slightly before gently falling down, or things like that. A good tip is: instead of trying to move yourself, you stay still and move the dream around you, as though you are rotating a 3D model (because guess what: you are).
Confronting your nightmares and/or general fears is a good thing for many. Think, while you’re still awake during the day, about what you would do about the source/trigger of your fear if you had magical powers. Whatever you choose, keep it consistent for now, because this is about habit-forming.
Example: let’s say there’s a person from your past who appears in your nightmares. Let’s say your chosen magic would be “I would cause the ground to open up, swallow them, and close again behind them”. Vividly imagine that whenever they come to mind while you are awake, and when you encounter them next in a nightmare, you’ll remember to do exactly that, and it’ll work.
Learning about your own subconscious is a more advanced activity, but once you’re used to lucid dreaming, you can remember that everything in there is an internal projection of your own mind, so you can literally talk to parts of your subconscious, including past versions of yourself, or singular parts of your greater-whole personality, as per IFS:
Take Care Of Your “Unwanted” Parts Too!
Want to know more?
You might like to read:
Enjoy!
Don’t Forget…
Did you arrive here from our newsletter? Don’t forget to return to the email to continue learning!
Learn to Age Gracefully
Join the 98k+ American women taking control of their health & aging with our 100% free (and fun!) daily emails: