I’ve been sick. When can I start exercising again?
10almonds is reader-supported. We may, at no cost to you, receive a portion of sales if you purchase a product through a link in this article.
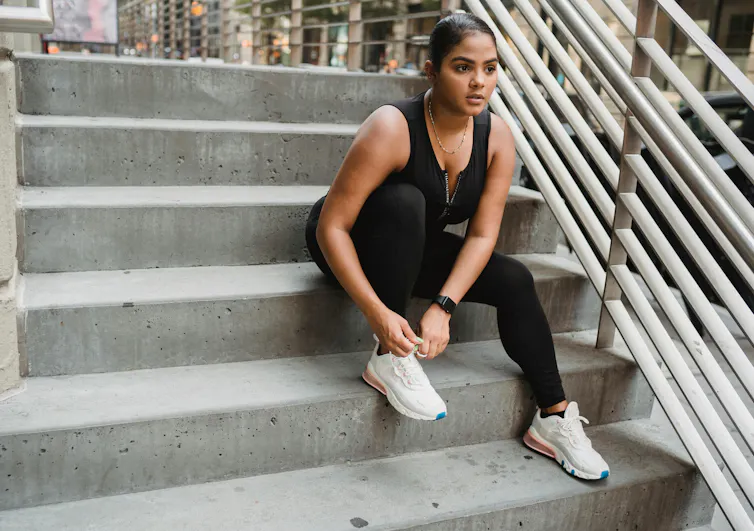
You’ve had a cold or the flu and your symptoms have begun to subside. Your nose has stopped dripping, your cough is clearing and your head and muscles no longer ache.
You’re ready to get off the couch. But is it too early to go for a run? Here’s what to consider when getting back to exercising after illness.
Exercise can boost your immune system – but not always
Exercise reduces the chance of getting respiratory infections by increasing your immune function and the ability to fight off viruses.
However, an acute bout of endurance exercise may temporarily increase your susceptibility to upper respiratory infections, such as colds and the flu, via the short-term suppression of your immune system. This is known as the “open window” theory.
A study from 2010 examined changes in trained cyclists’ immune systems up to eight hours after two-hour high-intensity cycling. It found important immune functions were suppressed, resulting in an increased rate of upper respiratory infections after the intense endurance exercise.
So, we have to be more careful after performing harder exercises than normal.
Can you exercise when you’re sick?
This depends on the severity of your symptoms and the intensity of exercise.
Mild to moderate exercise (reducing the intensity and length of workout) may be OK if your symptoms are a runny nose, nasal congestion, sneezing and minor sore throat, without a fever.
Exercise may help you feel better by opening your nasal passages and temporarily relieving nasal congestion.
However, if you try to exercise at your normal intensity when you are sick, you risk injury or more serious illness. So it’s important to listen to your body.
If your symptoms include chest congestion, a cough, upset stomach, fever, fatigue or widespread muscle aches, avoid exercising. Exercising when you have these symptoms may worsen the symptoms and prolong the recovery time.
If you’ve had the flu or another respiratory illness that caused a high fever, make sure your temperature is back to normal before getting back to exercise. Exercising raises your body temperature, so if you already have a fever, your temperature will become high quicker, which makes you sicker.
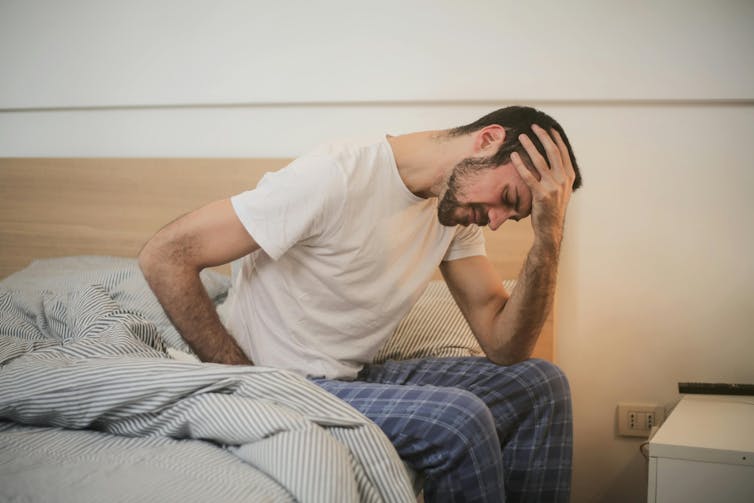
If you have COVID or other contagious illnesses, stay at home, rest and isolate yourself from others.
When you’re sick and feel weak, don’t force yourself to exercise. Focus instead on getting plenty of rest. This may actually shorten the time it takes to recover and resume your normal workout routine.
I’ve been sick for a few weeks. What has happened to my strength and fitness?
You may think taking two weeks off from training is disastrous, and worry you’ll lose the gains you’ve made in your previous workouts. But it could be just what the body needs.
It’s true that almost all training benefits are reversible to some degree. This means the physical fitness that you have built up over time can be lost without regular exercise.
To study the effects of de-training on our body functions, researchers have undertaken “bed rest” studies, where healthy volunteers spend up to 70 days in bed. They found that V̇O₂max (the maximum amount of oxygen a person can use during maximal exercise, which is a measure of aerobic fitness) declines 0.3–0.4% a day. And the higher pre-bed-rest V̇O₂max levels, the larger the declines.
In terms of skeletal muscles, upper thigh muscles become smaller by 2% after five days of bed rest, 5% at 14 days, and 12% at 35 days of bed rest.
Muscle strength declines more than muscle mass: knee extensor muscle strength gets weaker by 8% at five days, 12% at 14 days and more than 20% after around 35 days of bed rest.
This is why it feels harder to do the same exercises after resting for even five days.
But in bed rest studies, physical activities are strictly limited, and even standing up from a bed is prohibited during the whole length of a study. When we’re sick in bed, we have some physical activities such as sitting on a bed, standing up and walking to the toilet. These activities could reduce the rate of decreases in our physical functions compared with study participants.
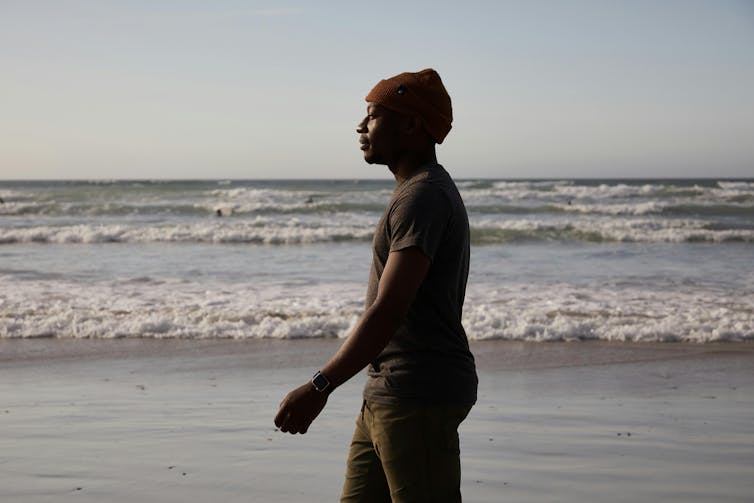
How to ease back into exercise
Start with a lower-intensity workout initially, such as going for a walk instead of a run. Your first workout back should be light so you don’t get out of breath. Go low (intensity) and go slow.
Gradually increase the volume and intensity to the previous level. It may take the same number of days or weeks you rested to get back to where you were. If you were absent from an exercise routine for two weeks, for example, it may require two weeks for your fitness to return to the same level.
If you feel exhausted after exercising, take an extra day off before working out again. A day or two off from exercising shouldn’t affect your performance very much.
Ken Nosaka, Professor of Exercise and Sports Science, Edith Cowan University
This article is republished from The Conversation under a Creative Commons license. Read the original article.
Don’t Forget…
Did you arrive here from our newsletter? Don’t forget to return to the email to continue learning!

Learn to Age Gracefully
Join the 98k+ American women taking control of their health & aging with our 100% free (and fun!) daily emails:
-

PlantYou: Scrappy Cooking – by Carleigh Bodrug

10almonds is reader-supported. We may, at no cost to you, receive a portion of sales if you purchase a product through a link in this article.
This is a book that took “whole foods plant-based diet” and ran with it.
“Whole foods”, you say? Carleigh Bodrug has you covered in this guide to using pretty much everything.
One of the greatest strengths of the book is its “Got this? Make that” section, for using up those odds and ends that you’d normally toss.
You may be thinking: “ok, but if to use this unusual ingredient I have to buy four other ingredients to make this recipe, generating waste from those other ingredients, then this was a bad idea”, but fear not.
Bodrug covers that too, and in many cases leftover “would get wasted” ingredients can get turned into stuff that can go into longer-term storage one way or another, to use at leisure.
Which also means that on the day “there’s nothing in the house to eat” and you don’t want to go grocery-shopping, or if some global disaster causes the supply lines to fail and the stores become empty (that could never happen though, right?), you will have the mystical ability to conjure a good meal out of assorted odds and ends that you stored because of this book.
Bottom line: if you love food and hate food waste, this is a great book for you.
Click here to check out Scrappy Cooking, and do domestic magic!
Share This Post
-

Is Fast Food Really All That Bad?
10almonds is reader-supported. We may, at no cost to you, receive a portion of sales if you purchase a product through a link in this article.
Yes, yes it is. However, most people misunderstand the nature of its badness, which is what causes problems. The biggest problem is not the acute effects of one afternoon’s burger and fries; the biggest problem is the gradual slide into regularly eating junk food, and the long-term effects of that habit as our body changes to accommodate it (of which, people tend to focus on subcutaneous fat gain as it’s usually the most visible, but that’s really the least of our problems).
Cumulative effects
There are, of course, immediate negative effects too, and they’re not without cause for concern. Because of the composition of most junk food, it will almost by definition result in immediate blood sugar spikes, rising insulin levels, and a feeling of fatigue not long afterwards.
- Within a week of regularly consuming junk food, gut bacteria will change, resulting in moderate cravings, as well as a tendency towards depression and anxiety. Mood swings are likely, as are the gastrointestinal woes associated with any gut microbiota change.
- Within two weeks, those effects will be greater, the cravings will increase, energy levels will plummet, and likely skin issues may start to show up (our skin mostly works on a 3-week replacement cycle; some things can show up in the skin more quickly or slowly than that, though).
- Within three weeks, the rest of our blood metrics (e.g. beyond blood sugar imbalances) will start to stray from safe zones. Increased LDL, decreased HDL, and the beginnings of higher cardiovascular disease risk and diabetes risk.
- Within a month, we will likely see the onset of non-alcoholic fatty liver disease, and chronic inflammation sets in, raising the risk of a lot of other diseases, especially immune disorders and cancer.
If that seems drastic, along the lines of “eat junk food for a month and get cancer”, well, it’s an elevated risk, not a scheduled diagnosis, but the body is constantly rebuilding itself, for better or for worse, and if we sabotage its efforts by consuming a poor diet, then it will be for worse.
The good news is: this works both ways, and we can get our body back on track in fairly short order too, by enjoying a healthier diet; our body will be thrilled to start repairing itself. And of course, all these effects, good and bad, are proportional to how well or badly we eat. There’s a difference between doing a “Supersize Me” month-long 100% junk food diet, and “merely” getting a junk food breakfast each day and eating healthily later.
In short, if your diet is only moderately bad, then you will only be moderately unwell.
For more on all of this, enjoy:
Click Here If The Embedded Video Doesn’t Load Automatically!
Want to learn more?
You might also like to read:
- Fix Chronic Fatigue & Regain Your Energy, By Science
- How To Unfatty A Fatty Liver
- How to Prevent (or Reduce) Inflammation
Take care!
Share This Post
-
7 Days Of Celery Juice: What’s The Verdict?
10almonds is reader-supported. We may, at no cost to you, receive a portion of sales if you purchase a product through a link in this article.
Laura “Try” tries many popular trends, and reports on the benefits (or problems, or both). In this case, it’s 7 days of celery juice… Not as a fast, though, i.e. she doesn’t just have celery juice for 7 days, but rather, it’s how she kicks off each morning, with half a liter (16oz) on an empty stomach.
What she found
First, she bought a masticating juicer and organic celery. So, those are expenses to consider, especially the one-off expense of the juicer, and the ongoing expense of organic celery—estimated $90/month).
In terms of taste, she was surprised it wasn’t as bitter as expected, but from the second day onwards, she did use the juicer’s filter to remove the frothy sludge, and she also switched to juicing only the stalks, not the leaves—which are more bitter.
10almonds note: the leaves are more bitter because that’s where the polyphenols are more densely concentrated. The leaves are better for you than the stalks. Enjoy the leaves. Really: if you chop them finely you can use them as herbs in your cooking, and if you’re making a salad, just chop them into that too.
The reason she picked the quantity of half a liter is because this is what she found recommended to coat the stomach lining—on the promise of increased stomach acid production, reduced bacteria overgrowth, as well as antiviral, antifungal, and anti-inflammatory properties. As she’s just one woman without a personal lab, she couldn’t test and thus verify any of these though—but she did still have benefits to report:
She did experience clearer skin, more energy, and better sleep after a few days.
Ultimately, she decided to continue to do it just at the weekends, due to its positive effects, despite the cost and time consumption.
For more personal insights, enjoy:
Click Here If The Embedded Video Doesn’t Load Automatically!
Want to learn more?
You might also like to read:
Enjoy Bitter Foods For Your Heart & Brain
Take care!
Share This Post
-

Getting to Neutral – by Trevor Moawad
10almonds is reader-supported. We may, at no cost to you, receive a portion of sales if you purchase a product through a link in this article.
We all know that a pessimistic outlook is self-defeating… And yet, toxic positivity can also be a set-up for failure! At some point, reckless faith in the kindly nature of the universe will get crushed, badly. Sometimes that point is a low point in life… sometimes it’s six times a day. But one thing’s for sure: we can’t “just decide everything will go great!” because the world just doesn’t work that way.
That’s where Trevor Moawad comes in. “Getting to neutral” is not a popular selling point. Everyone wants joy, abundance, and high after high. And neutrality itself is often associated with boredom and soullessness. But, Moawad argues, it doesn’t have to be that way.
This book’s goal—which it accomplishes well—is to provide a framework for being a genuine realist. What does that mean?
“I’m not a pessimist; I’m a realist” – every pessimist ever.
^Not that. That’s not what it means. What it means instead is:
- Hope for the best
- Prepare for the worst
- Adapt as you go
…taking care to use past experiences to inform future decisions, but without falling into the trap of thinking that because something happened a certain way before, it always will in the future.
To be rational, in short. Consciously and actively rational.
Feel the highs! Feel the lows! But keep your baseline when actually making decisions.
Bottom line: this book is as much an antidote to pessimism and self-defeat, as it is to reckless optimism and resultant fragility. Highly recommendable.
Click here to check out “Getting to Neutral” and start creating your best, most reason-based life!
PS: in this book, Moawad draws heavily from his own experiences of battling adversity in the form of cancer—of which he died, before this book’s publication. A poignant reminder that he was right: we won’t always get the most positive outcome of any given situation, so what matters the most is making the best use of the time we have.
Don’t Forget…
Did you arrive here from our newsletter? Don’t forget to return to the email to continue learning!
Learn to Age Gracefully
Join the 98k+ American women taking control of their health & aging with our 100% free (and fun!) daily emails:
-
What’s Your Vascular Dementia Risk?
10almonds is reader-supported. We may, at no cost to you, receive a portion of sales if you purchase a product through a link in this article.
We often say that “what’s good for your heart is good for your brain”, and this is because the former feeds the latter, with oxygen and nutrients, and also clears away detritus like beta-amyloid (associated with Alzheimer’s) and alpha-synuclein (associated with Parkinson’s).
For more on those, see: How To Clean Your Brain (Glymphatic Health Primer)
For this reason, there are many risk factors that apply equally cardiovascular disease (CVD), and neurodegenerative diseases like Alzheimer’s and other vascular dementias, as well as stroke risk.
The link between the two has also been studied; recently a team of scienists led by Dr. Anisa Dhana asked the question:
❝What is the association between cardiovascular health (CVH) and biomarkers of neurodegeneration, including neurofilament light chain and total tau?❞
To answer this, they looked at data from more than 10,000 Americans aged 65+; of these, they were able to get serum samples from 5,470 of them, and tested those samples for the biomarkers of neurodegeneration mentioned above.
They then tabulated the results with cardiovascular health scores based on the American Heart Association (AHA)’s “Life’s Simple 7” tool, and found, amongst other things:
- 34.6% of participants carried the APOE e4 allele, a genetic risk factor for Alzheimer’s.
- Higher CVH scores were associated with lower NfL levels, but not with t-tau concentrations.
- APOE e4 carriers with high CVH had significantly lower NfL levels.
- Race did not influence the CVH-NfL relationship.
- Higher CVH was linked to a slower annual increase in NfL levels but did not affect t-tau changes.
- Over 10 years, participants with the lowest CVH scores saw a 7.1% annual increase in NfL levels, while those with the highest CVH scores had a 5.2% annual increase.
- Better CVH is linked to lower serum NfL levels, regardless of age, sex, or race.
- CVH is particularly crucial for APOE e4 carriers
In other words: higher cardiovascular health meant lower markers of neurodegeneration, and this not only still held true for APOE e4 carriers, but also, the benefits actually even more pronounced in those participants.
You may be wondering: “but it said it helped with NfL levels, not t-tau concentrations?” And, indeed, it is so. But this means that the overall neurodegeneration risk is still inversely proportional to cardiovascular health; it just means it’s not a magical panacea and we must still do other things too.
See also: How To Reduce Your Alzheimer’s Risk
And as for the study, you can read the paper itself in full here:
Cardiovascular Health and Biomarkers of Neurodegenerative Disease in Older Adults
Life’s Simple 7
We mentioned that they used the AHA’s “Life’s Simple 7” tool to assess cardiovascular health; it is indeed simple, but important. Here it is:
Metric Poor Intermediate Ideal Current smoking Yes Former ≤12 mo Never or quit >12 mo BMI, kg/m2 ≥30 25–29.9 <25 Physical activity None 1–149 min/wk of moderate activity or 1–74 min/wk of vigorous activity or 1–149 min/wk of moderate and vigorous activity ≥150 min/wk of moderate activity or ≥75 min/wk of vigorous activity or ≥150 min/wk of moderate and vigorous activity Diet pattern score* 0–1 2–3 4–5 Total cholesterol, mg/dL ≥240 200–239 or treated to goal <200 Blood pressure, mm Hg SBP ≥140 or DBP ≥90 SBP 120–139 or DBP 80–89 or treated to goal <120/<80 Fasting plasma glucose, mg/dL ≥126 100–125 or treated to goal <100 *Each of the following 5 diet elements is given a score of 1: (1) ≥4.5 cups/day of fruits and vegetables; (2) ≥2 servings/week of fish; (3) ≥3 servings/day of whole grains; (4) no more than 36 oz/wk of sugar‐sweetened beverages; and (5) no more than 1500 mg/d of sodium.
As the AHA notes,
❝Unfortunately, 99% of the U.S. adult population has at least one of seven cardiovascular health risks: tobacco use,
poor diet, physical inactivity, unhealthy weight, high blood pressure, high cholesterol or high blood glucose.❞It then goes on to talk about the financial burden of this on employers, but this was taken from a workplace health resource, and we recognize the rest of it won’t be of pressing concern for most of our readers. In case you are interested though, here it is:
American Heart Association | Life’s Simple 7® Journey to Health™
For a more practical (if you’re just a private individual and employee healthcare is not your main concern) overview, see:
Want to know more?
Here are some very good starting points for improving each of those 7 metrics, as necessary:
- Which Addiction-Quitting Methods Work Best?
- How To Lose Weight (Healthily!)
- The Doctor Who Wants Us To Exercise Less, & Move More
- Which Diet? Top Diets Ranked By Experts
- Lower Cholesterol Naturally, Without Statins
- 10 Ways To Lower Blood Pressure Naturally
- 10 Ways To Balance Your Blood Sugars
Take care!
Don’t Forget…
Did you arrive here from our newsletter? Don’t forget to return to the email to continue learning!
Learn to Age Gracefully
Join the 98k+ American women taking control of their health & aging with our 100% free (and fun!) daily emails:
-

Life After Death? (Your Life; A Loved One’s Death)
10almonds is reader-supported. We may, at no cost to you, receive a portion of sales if you purchase a product through a link in this article.
The Show Must Go On
We’ve previously written about the topics of death and dying. It’s not cheery, but it is important to tackle.
Sooner is better than later, in the case of:
Preparations For Managing Your Own Mortality
And for those who are left behind, of course it is hardest of all:
What Grief Does To Your Body (And How To Manage It)
But what about what comes next? For those who are left behind, that is.
Life goes on
In cases when the death is that of a close loved one, the early days after death can seem like a surreal blur. How can the world go ticking on as normal when [loved one] is dead?
But incontrovertibly, it does, so we can only ask again: how?
And, we get to choose that, to a degree. The above-linked article about grief gives a “101” rundown, but it’s (by necessity, for space) a scant preparation for one of the biggest challenges in life that most of us will ever face.
For many people, processing grief involves a kind of “saying goodbye”. For others, it doesn’t, as in the following cases of grieving the loss of one’s child—something no parent should ever have to face, but it happens:
Dr. Ken Druck | The Love That Never Dies
(with warning, the above article is a little heavy)
In short: for those who choose not to “say goodbye” in the case of the death of a loved one, it’s more often not a case of cold neglect, but rather the opposite—a holding on. Not in the “denial” sense of holding on, but rather in the sense of “I am not letting go of this feeling of love, no matter how much it might hurt to hold onto; it’s all I have”.
What about widows, and love after death?
Note: we’ll use the feminine “widow” here as a) it’s the most common and b) most scientific literature focuses on widows, but there is no reason why most of the same things won’t also apply to widowers.
We say “most”, as society does tend to treat widows and widowers differently, having different expectations about a respectful mourning period, one’s comportment during same, and so on.
As an aside: most scientific literature also assumes heterosexuality, which is again statistically reasonable, and for the mostpart the main difference is any extra challenges presented by non-recognition of marriages, and/or homophobic in-laws. But otherwise, grief is grief, and as the saying goes, love is love.
One last specificity before we get into the meat of this: we are generally assuming marriages to be monogamous here. Polyamorous arrangements will likely sidestep most of these issues completely, but again, they’re not the norm.
Firstly, there’s a big difference between remarrying (or similar) after being widowed, and remarrying (or similar) after a divorce, and that largely lies in the difference of how they begin. A divorce is (however stressful it may often be) more often seen as a transition into a new period of freedom, whereas bereavement is almost always felt as a terrible loss.
The science, by the way, shows the stats for this; people are less likely to remarry, and slower to remarry if they do, in instances of bereavement rather than divorce, for example:
Timing of Remarriage Among Divorced and Widowed Parents
Love after death: the options
For widows, then, there seem to be multiple options:
- Hold on to the feelings for one’s deceased partner; never remarry
- Grieve, move on, find new love, relegating the old to history
- Try to balance the two (this is tricky but can be done*)
*Why is balancing the two tricky, and how can it be done?
It’s tricky because ultimately there are three people’s wishes at hand:
- The deceased (“they would want me to be happy” vs “I feel I would be betraying them”—which two feelings can also absolutely come together, by the way)
- Yourself (whether you actually want to get a new partner, or just remain single—this is your 100% your choice either way, and your decision should be made consciously)
- The new love (how comfortable are they with your continued feelings for your late love, really?)
And obviously only two of the above can be polled for opinions, and the latter one might say what they think we want to hear, only to secretly and/or later resent it.
One piece of solid advice for the happily married: talk with your partner now about how you each would feel about the other potentially remarrying in the event of your death. Do they have your pre-emptive blessing to do whatever, do you ask a respectable mourning period first (how long?), would the thought just plain make you jealous? Be honest, and bid your partner be honest too.
One piece of solid advice for everyone: make sure you, and your partner(s), as applicable, have a good emotional safety net, if you can. Close friends or family members that you genuinely completely trust to be there through thick and thin, to hold your/their hand through the emotional wreck that will likely follow.
Because, while depression and social loneliness are expected and looked out for, it’s emotional loneliness that actually hits the hardest, for most people:
Longitudinal Examination of Emotional Functioning in Older Adults After Spousal Bereavement
…which means that having even just one close friend or family member with whom one can be at one’s absolute worst, express emotions without censure, not have to put on the socially expected appearance of emotional stability… Having that one person (ideally more, but having at least one is critical) can make a huge difference.
But what if a person has nobody?
That’s definitely a hard place to be, but here’s a good starting point:
How To Beat Loneliness & Isolation
Take care!
Don’t Forget…
Did you arrive here from our newsletter? Don’t forget to return to the email to continue learning!
Learn to Age Gracefully
Join the 98k+ American women taking control of their health & aging with our 100% free (and fun!) daily emails: