Superfood Energy Balls
10almonds is reader-supported. We may, at no cost to you, receive a portion of sales if you purchase a product through a link in this article.
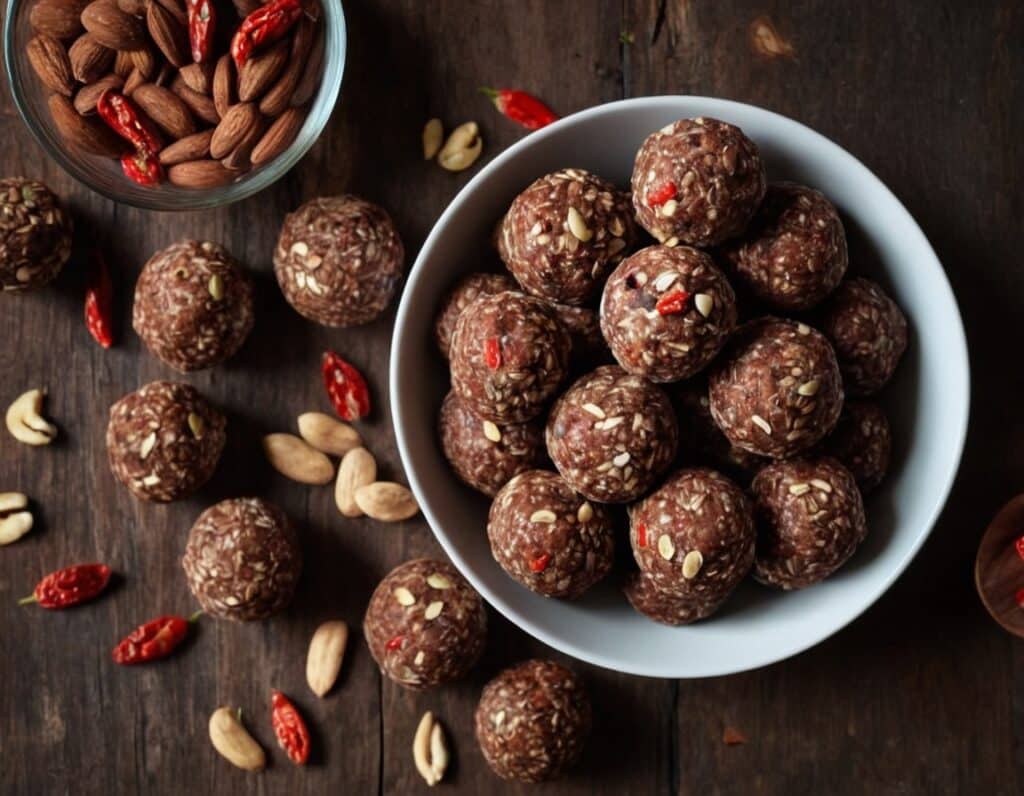
They are healthy, they are tasty, they are convenient! Make some of these and when you need an energizing treat at silly o’clock when you don’t have time to prepare something, here they are, full of antioxidants, vitamins and minerals, good for blood sugars too, and ready to go:
You will need
- 1 cup pitted dates
- 1 cup raw mixed nuts
- ¼ cup goji berries
- 1 tbsp cocoa powder
- 1 tsp chili flakes
Naturally, you can adjust the spice level if you like! But this is a good starter recipe.
Method
(we suggest you read everything at least once before doing anything)
1) Blend all the ingredients in a good processor to make a dough
2) Roll the dough into 1″ balls; you should have enough dough for about 16 balls. If you want them to be pretty, you can roll them in some spare dry ingredients (e.g. chopped nuts, goji berries, chili flakes, seeds of some kind, whatever you have in your kitchen that fits the bill).
3) Refrigerate for at least 1–2 hours, and serve! They can also be kept in the fridge for at least a good while—couldn’t tell you how long for sure though, because honestly, they’ve never stayed that long in the fridge without being eaten.

Enjoy!
Want to learn more?
For those interested in some of the science of what we have going on today:
- Dates vs Figs – Which is Healthier?
- Why You Should Diversify Your Nuts!
- Goji Berries: Which Benefits Do They Really Have?
- The Sugary Food That Lowers Blood Sugars
- Enjoy Bitter Foods For Your Heart & Brain
- Capsaicin’s Hot Benefits
Take care!
Don’t Forget…
Did you arrive here from our newsletter? Don’t forget to return to the email to continue learning!
Recommended
Learn to Age Gracefully
Join the 98k+ American women taking control of their health & aging with our 100% free (and fun!) daily emails:
-
Stevia vs Acesulfame Potassium – Which is Healthier?
10almonds is reader-supported. We may, at no cost to you, receive a portion of sales if you purchase a product through a link in this article.
Our Verdict
When comparing stevia to acesulfame potassium, we picked the stevia.
Why?
You may be wondering: is acesulfame potassium a good source of potassium?
And the answer is: no, it is not. Obviously, it does contain potassium, but let’s do some math here:
- Acesulfame potassium is 200x sweeter than sugar
- Therefore replacing a 15g teaspoon of sugar = 75mg acesulfame potassium
- Acesulfame potassium’s full name is “potassium 6-methyl-2,2-dioxo-2H-1,2λ6,3-oxathiazin-4-olate”
- That’s just one potassium atom in there with a lot of other stuff
- Acesulfame potassium has a molar mass of 201.042 g/mol
- Potassium itself has a molar mass of 39.098 g/mol
- Therefore acesulfame potassium is 100(39.098/201.042) = 19.45% potassium by mass
- So that 75mg of acesulfame potassium contains just under 15mg of potassium, which is less than 0.5% of your recommended daily amount of potassium. Please consider eating a fruit instead.
So, that’s that, and the rest of the nutritional values of both sweeteners are just a lot of zeros.
What puts stevia ahead? Simply, based on studies available so far, moderate consumption of stevia improves gut microdiversity, whereas acesulfame potassium harms gut microdiversity:
- The Effects of Stevia Consumption on Gut Bacteria: Friend or Foe?
- The Artificial Sweetener Acesulfame Potassium Affects the Gut Microbiome
Want to give stevia a try?
Here’s an example product on Amazon
Enjoy!
Share This Post
-
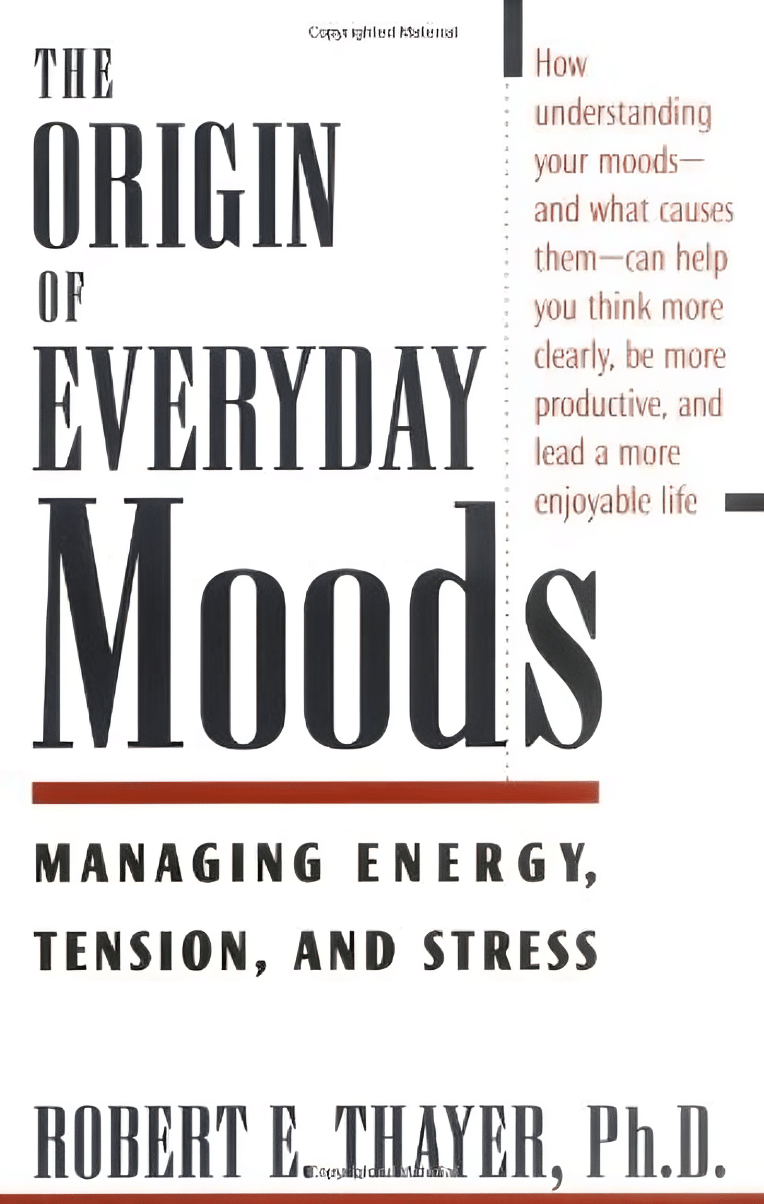
The Origin of Everyday Moods – by Dr. Robert Thayer
10almonds is reader-supported. We may, at no cost to you, receive a portion of sales if you purchase a product through a link in this article.
First of all, what does this title mean by “everyday moods”? By this the author is referring to the kinds of moods we have just as a matter of the general wear-and-tear of everyday life—not the kind that come from major mood disorders and/or serious trauma.
The latter kinds of mood take less explaining, in any case. Dr. Thayer, therefore, spends his time on the less obvious ones—which in turn are the ones that affect most of the most, every day.
Critical to Dr. Thayer’s approach is the mapping of moods by four main quadrants:
- High energy, high tension
- High energy, low tension
- Low energy, high tension
- Low energy, low tension
…though this can be further divided into 25 sectors, if we rate each variable on a scale of 0–4. But for the first treatment, it suffices to look at whether energy and tension are high or low, respectively, and which we’d like to have more or less of.
Then (here be science) how to go about achieving that in the most efficient, evidence-based ways. So, it’s not just a theoretical book; it has great practical value too.
The style of the book is accessible, and walks a fine line between pop-science and hard science, which makes it a great book for laypersons and academics alike.
Bottom line: if you’d like the cheat codes to improve your moods and lessen the impact of bad ones, this is the book for you.
Click here to check out The Origin of Everyday Moods, and manage yours!
Share This Post
-
Anti-Cholesterol Cardamom & Pistachio Porridge
10almonds is reader-supported. We may, at no cost to you, receive a portion of sales if you purchase a product through a link in this article.
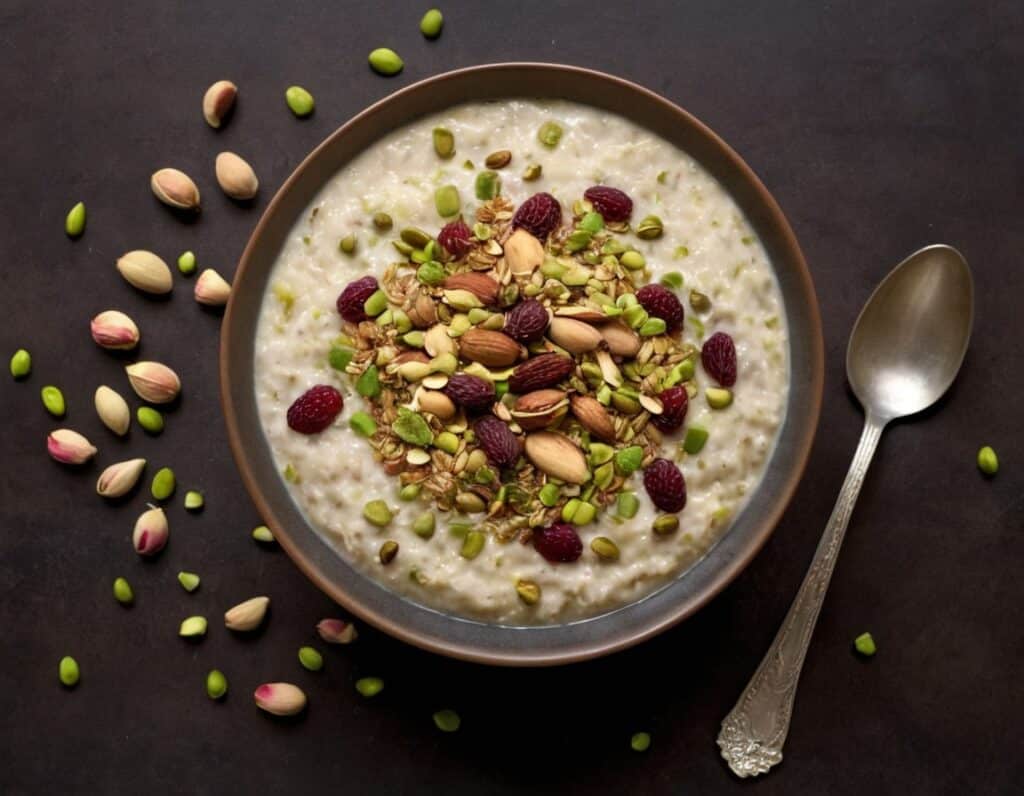
This tasty breakfast’s beta-glucan content binds to cholesterol and carries it out of the body; there are lots of other nutritional benefits too!
You will need
- 1 cup coconut milk
- ⅓ cup oats
- 4 tbsp crushed pistachios
- 6 cardamom pods, crushed
- 1 tsp rose water or 4 drops edible rose essential oil
- Optional sweetener: drizzle of honey or maple syrup
- Optional garnishes: rose petals, chopped nuts, dried fruit
Method
(we suggest you read everything at least once before doing anything)
1) Heat the coconut milk, adding the oats and crushed cardamom pods. Simmer for 5–10 minutes depending on how cooked you want the oats to be.
2) Stir in the crushed pistachio nuts, as well as the rose water.
3) Serve in a bowl, adding any optional toppings:
Enjoy!
Want to learn more?
For those interested in some of the science of what we have going on today:
- The Best Kind Of Fiber For Overall Health? ← it’s beta-glucan, which is fund abundantly in oats
- Pistachios vs Pecans – Which is Healthier? ← have a guess
- Can Saturated Fats Be Healthy? ← coconut can!
Take care!
Share This Post
Related Posts
-
Are You Eating AGEs?
10almonds is reader-supported. We may, at no cost to you, receive a portion of sales if you purchase a product through a link in this article.
The Trouble of the AGEs
Advanced Glycation End-Products (AGEs) are the result of the chemical process of glycation, which can occur in your body in response to certain foods you ate, or you can consume them directly, if you eat animal products that contained them (because we’re not special and other animals glycate too, especially mammals such as pigs, cows, and sheep).
As a double-whammy, if you cook animal products (especially without water, such as by roasting or frying), extra AGEs will form during cooking.
When proteinous and/or fatty food turns yellow/golden/brown during cooking, that’s generally glycation.
If there’s starch present, some or all of that yellow/golden/brown stuff will be a Maillard Reaction Product (MRP), such as acrylamide. That’s not exactly a health food, but it’s nowhere near being even in the same ballpark of badness.
In short, during cooking:
- Proteinous/fatty food turns yellow/golden/brown = probably an AGE
- Starchy food turns yellow/golden/brown = probably a MRP
The AGEs are far worse.
What’s so bad about AGEs?
Let’s do a quick tour of some studies:
- The role of advanced glycation end-products in retinal ageing and disease
- Advanced glycation end-products and their circulating receptors predict cardiovascular disease mortality in older women
- Elevated serum advanced glycation end-products in obese indicate risk for the metabolic syndrome: a link between healthy and unhealthy obesity?
- Increased levels of serum advanced glycation end-products in women with polycystic ovary syndrome
- Advanced glycation end-products and their involvement in liver disease
- Effects of advanced glycation end-products on renal fibrosis and oxidative stress
- Role of advanced glycation end-products and oxidative stress in vascular complications in diabetes
- Cancer malignancy is enhanced by advanced glycation end-products
- Advanced glycation end-products in the pathogenesis of Alzheimer’s disease
We could keep going, but you probably get the picture!
What should we do about it?
There are three main ways to reduce serum AGE levels:
Reduce or eliminate consumption of animal products
Especially mammalian animal products, such as from pigs, cows, and sheep, especially their meat. Processed versions are even worse! So, steak is bad, but bacon and sausages are literally top-tier bad.
Cook wet
Dry cooking (which includes frying, and especially includes deep fat frying, which is worse than shallow frying which is worse than air frying) produces far more AGEs than cooking with methods that involve water (boiling, steaming, slow-cooking, etc).
As a bonus, adding acidic ingredients (e.g. vinegar, lemon juice, tomato juice) can halve the amount of AGEs produced.
Consume antioxidants
Our body does have some ability to deal with AGEs, but that ability has its limits, and our body can be easily overwhelmed if we consume foods that are bad for it. So hopefully you’ll tend towards a plant-based diet, but whether you do or don’t:
You can give your body a hand by consuming antioxidant foods and drinks (such as berries, tea/coffee, and chocolate), and/or taking supplements.
Want to know more about the science of this?
Check out…
Advanced Glycation End-Products in Foods and a Practical Guide to Their Reduction in the Diet
Don’t Forget…
Did you arrive here from our newsletter? Don’t forget to return to the email to continue learning!
Learn to Age Gracefully
Join the 98k+ American women taking control of their health & aging with our 100% free (and fun!) daily emails:
-
Women take more antidepressants after divorce than men but that doesn’t mean they’re more depressed
10almonds is reader-supported. We may, at no cost to you, receive a portion of sales if you purchase a product through a link in this article.
Research out today from Finland suggests women may find it harder to adjust to later-life divorce and break-ups than men.
The study used population data from 229,000 Finns aged 50 to 70 who had undergone divorce, relationship break-up or bereavement and tracked their use of antidepressants before and after their relationship ended.
They found antidepressant use increased in the four years leading to the relationship dissolution in both genders, with women experiencing a more significant increase.
But it’s too simplistic to say women experience poorer mental health or tend to be less happy after divorce than men.
Remind me, how common is divorce?
Just under 50,000 divorces are granted each year in Australia. This has slowly declined since the 1990s.
More couple are choosing to co-habitate, instead of marry, and the majority of couples live together prior to marriage. Divorce statistics don’t include separations of cohabiting couples, even though they are more likely than married couples to separate.
Those who divorce are doing so later in life, often after their children grow up. The median age of divorce increased from 45.9 in 2021 to 46.7 in 2022 for men and from 43.0 to 43.7 for women.
The trend of late divorces also reflects people deciding to marry later in life. The median duration from marriage to divorce in 2022 was around 12.8 years and has remained fairly constant over the past decade.
Why do couples get divorced?
Changes in social attitudes towards marriage and relationships mean divorce is now more accepted. People are opting not to be in unhappy marriages, even if there are children involved.
Instead, they’re turning the focus on marriage quality. This is particularly true for women who have established a career and are financially autonomous.
Similarly, my research shows it’s particularly important for people to feel their relationship expectations can be fulfilled long term. In addition to relationship quality, participants reported needing trust, open communication, safety and acceptance from their partners.
“Grey divorce” (divorce at age 50 and older) is becoming increasingly common in Western countries, particularly among high-income populations. While factors such as an empty nest, retirement, or poor health are commonly cited predictors of later-in-life divorce, research shows older couples divorce for the same reasons as younger couples.
What did the new study find?
The study tracked antidepressant use in Finns aged 50 to 70 for four years before their relationship breakdown and four years after.
They found antidepressant use increased in the four years leading to the relationship break-up in both genders. The proportion of women taking antidepressants in the lead up to divorce increased by 7%, compared with 5% for men. For de facto separation antidepressant use increased by 6% for women and 3.2% for men.
Within a year of the break-up, antidepressant use fell back to the level it was 12 months before the break-up. It subsequently remained at that level among the men.
But it was a different story for women. Their use tailed off only slightly immediately after the relationship breakdown but increased again from the first year onwards.
Women’s antidepressant use increased again.
sk/UnsplashThe researchers also looked at antidepressant use after re-partnering. There was a decline in the use of antidepressants for men and women after starting a new relationship. But this decline was short-lived for women.
But there’s more to the story
Although this data alone suggest women may find it harder to adjust to later-life divorce and break-ups than men, it’s important to note some nuances in the interpretation of this data.
For instance, data suggesting women experience depression more often than men is generally based on the rate of diagnoses and antidepressant use, which does not account for undiagnosed and unmedicated people.
Women are generally more likely to access medical services and thus receive treatment. This is also the case in Australia, where in 2020–2022, 21.6% of women saw a health professional for their mental health, compared with only 12.9% of men.
Why women might struggle more after separating
Nevertheless, relationship dissolution can have a significant impact on people’s mental health. This is particularly the case for women with young children and older women.
So what factors might explain why women might experience greater difficulties after divorce later in life?
Research investigating the financial consequences of grey divorce in men and women showed women experienced a 45% decline in their standard of living (measured by an income-to-needs ratio), whereas men’s dropped by just 21%. These declines persisted over time for men, and only reversed for women following re-partnering.
Another qualitative study investigating the lived experiences of heterosexual couples post-grey divorce identified financial worries as a common theme between female participants.
A female research participant (age 68) said:
[I am most worried about] the money, [and] what I’m going to do when the little bit of money I have runs out […] I have just enough money to live. And, that’s it, [and if] anything happens I’m up a creek. And Medicare is incredibly expensive […] My biggest expense is medicine.
Another factor was loneliness. One male research participant (age 54) described he preferred living with his ex-wife, despite not getting along with her, than being by himself:
It was still [good] knowing that [the] person was there, and now that’s gone.
Other major complications of later-life divorce are possible issues with inheritance rights and next-of-kin relationships for medical decision-making.
Separation can be positive
For some people, divorce or separation can lead to increased happiness and feeling more independent.
And the mental health impact and emotional distress of a relationship dissolution is something that can be counterattacked with resilience. Resilience to dramatic events built from life experience means older adults often do respond better to emotional distress and might be able to adjust better to divorce than their younger counterparts.
Raquel Peel, Adjunct Senior Lecturer, University of Southern Queensland and Senior Lecturer, RMIT University
This article is republished from The Conversation under a Creative Commons license. Read the original article.
Don’t Forget…
Did you arrive here from our newsletter? Don’t forget to return to the email to continue learning!
Learn to Age Gracefully
Join the 98k+ American women taking control of their health & aging with our 100% free (and fun!) daily emails:
-
When You Know What You “Should” Do (But Knowing Isn’t The Problem)
10almonds is reader-supported. We may, at no cost to you, receive a portion of sales if you purchase a product through a link in this article.
When knowing what to do isn’t the problem
Often, we know what we need to do. Sometimes, knowing isn’t the problem!
The topic today is going to be a technique used by therapeutic service providers to help people to enact positive changes in their lives.
While this is a necessarily dialectic practice (i.e., it involves a back-and-forth dialogue), it’s still perfectly possible to do it alone, and that’s what we’ll be focussing on in this main feature.
What is Motivational Interviewing?
❝Motivational interviewing (MI) is a technique that has been specifically developed to help motivate ambivalent patients to change their behavior.❞
Read in full: Motivational Interviewing: An Evidence-Based Approach for Use in Medical Practice
It’s mostly used for such things as helping people reduce or eliminate substance abuse, or manage their weight, or exercise more, things like that.
However, it can be employed for any endeavour that requires motivation and sustained willpower to carry it through.
Three Phases
Motivational Interviewing traditionally has three phases:
- Exploring and understanding the issue at hand
- Guiding and deciding importance and goals
- Choosing and setting an action plan
In self-practice, maybe you can already know and understand what it is that you want/need to change.
If not, consider asking yourself such questions as:
- What does a good day look like? What does a bad day look like?
- If things are not good now, when were they good? What changed?
- If everything were perfect now, what would that look like? How would you know?
Once you have a clear idea of where you want to be, the next thing to know is: how much do you want it? And how confident are you in attaining it?
This is a critical process:
- Give your answers numerically on a scale from 0 to 10
- Whatever your score, ask yourself why it’s not lower. For example, if you scored your motivation 4 and your confidence 2, what factors made your motivation not a lower number? What factors made your confidence not a lower number?
- In the unlikely event that you gave yourself a 0, ask whether you can really afford to scrap the goal. If you can’t, find something, anything, to bring it to at least a 1.
- After you’ve done that, then you can ask yourself the more obvious question of why your numbers aren’t higher. This will help you identify barriers to overcome.
Now you’re ready to choose what to focus on and how to do it. Don’t bite off more than you can chew; it’s fine to start low and work up. You should revisit this regularly, just like you would if you had a counsellor helping you.
Some things to ask yourself at this stage of the motivational self-interviewing:
- What’s a good SMART goal to get you started?
- What could stop you from achieving your goal?
- How could you overcome that challenge?
- What is your backup plan, if you have to scale back your goal for some reason?
A conceptual example: if your goal is to stick to a whole foods Mediterranean diet, but you are attending a wedding next week, then now is the time to decide in advance 1) what personal lines-in-the-sand you will or will not draw 2) what secondary, backup plan you will make to not go too far off track.
The same example in practice: wedding menus often offer meat/fish/vegetarian options, so you might choose the fish or vegetarian, and as for sugar and alcohol, you might limit yourself to “a small slice of wedding cake only; coffee/cheese option instead of dessert”, and “alcohol only for toasts”.
Giving yourself the permission well in advance for small (clearly defined and boundaried!) diversions from the plan, will stop you from falling into the trap of “well, since today’s a cheat-day now…”
Secret fourth stage
The secret here is to keep going back and reassessing at regular intervals. Set your own calendar; you might want to start out weekly and then move to monthly when you’re more strongly on-track.
For this reason, it’s good to keep a journal with your notes from your self-interview sessions, the scores you gave yourself, the goals and plans you set, etc.
When conducting your regular review, be sure to examine what worked for you, and what didn’t (and why). That way, you can practice trial-and-improvement as you go.
Want to learn more?
We only have so much room here, but there are lots of resources out there.
Here’s a high-quality page that:
- explains motivational interviewing in more depth than we have room for here
- offers a lot of free downloadable resource packs and the like
Check it out: Motivational Interviewing Theory & Resources
Enjoy!
Don’t Forget…
Did you arrive here from our newsletter? Don’t forget to return to the email to continue learning!
Learn to Age Gracefully
Join the 98k+ American women taking control of their health & aging with our 100% free (and fun!) daily emails:


